Building an MCSA lab with PfSense and VirtualBox
Published on 2016-08-11Most people getting into IT these days, specifically into system administration in the office automation field, start by learning Microsoft technology. Once you rise above the service desk level of technical skills, certification like MCSA for Windows Server becomes a logical step. In this post I’ll explain how to build a lab environment on a single desktop computer so you can practice the MCSA curriculum and get ready for the exams.
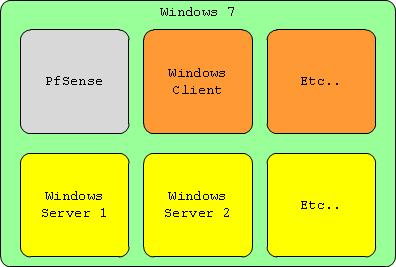
The main idea here is to use a single computer to build a network of virtual machines. A computer with 16 GB of RAM, a decent CPU and enough free space on an SSD is recommended. We use the combination of a Windows host OS, Oracle VirtualBox, and PfSense. Everything runs on top of the host OS. VirtualBox is used to provide virtualization. PfSense is used as a firewall to separate the lab environment from your home network. The VM’s are set up on the host system like this:
From the network perspective it looks like this:
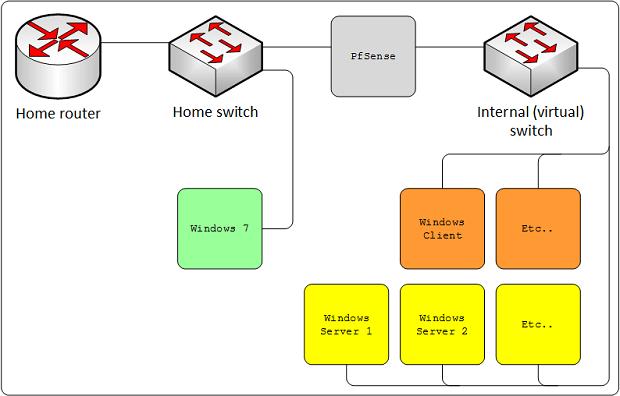
Both the host system (Windows 7 in the diagram) and the outside of the PfSense firewall are connected in the home network. The PfSense virtual machine gets two network adapters: one bridged interface that essentially makes it act like it is directly connected in your home network, and another interface that only connects to the internal network on the virtual switch.
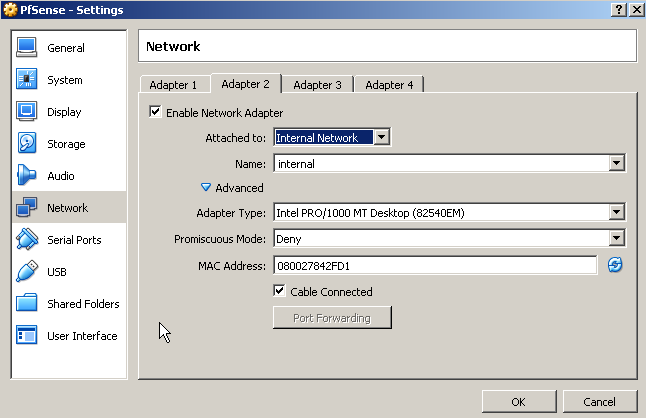
This post assumes you have VirtualBox installed with a Windows Server virtual machine ready. You can follow most of this post using another hypervisor of your choosing, like VMware Workstation or Microsoft Hyper-V. I used VirtualBox version 5.1.2, it’s available for Windows, OSX and Linux. The network interface of the Windows Server VM is supposed to be configured like this:
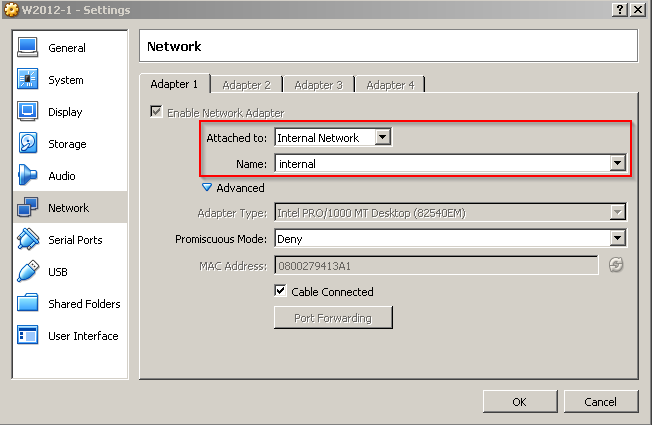
Attached to has to say Internal Network and the name can be whatever you want to name this particular internal network, just make sure all the internal VM’s use the same name. The next step is to acquire and install PfSense in another virtual machine. I got an ISO from this page:
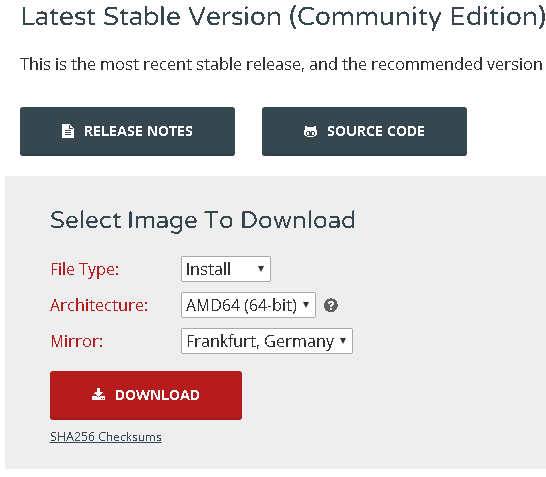
I’ve got no clue why I chose an architecture on this page, as the next page after the download button gives me a choice between all recent files anyway. Don’t get confused about the AMD64 option if you use an Intel CPU. AMD was the first to create 64 bit extensions for the x86 platform. AMD64 is also known as x64 or x86_64. I used PfSense version 2.3.2 for this post, by downloading this file. The download will have the .gz-extension because it is a gzip file. You can unzip it with tools like WinRAR or 7-Zip. When you have extracted the ISO, create a new virtual machine:
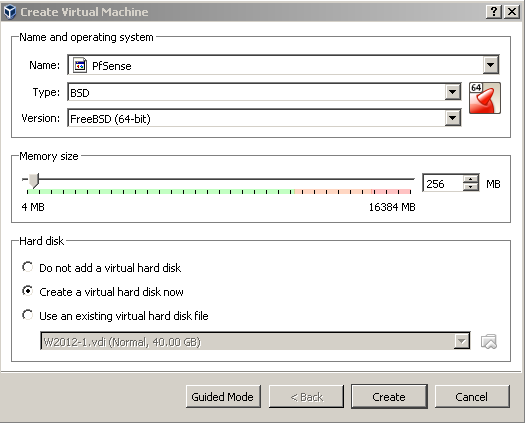
For this setup you can get away with 256 MB of RAM as the PfSense VM is not going to be under heavy load. In the screenshot I used expert mode so I could do a couple of settings at once. Notice the OS type, FreeBSD 64 bit, because PfSense is based on FreeBSD.
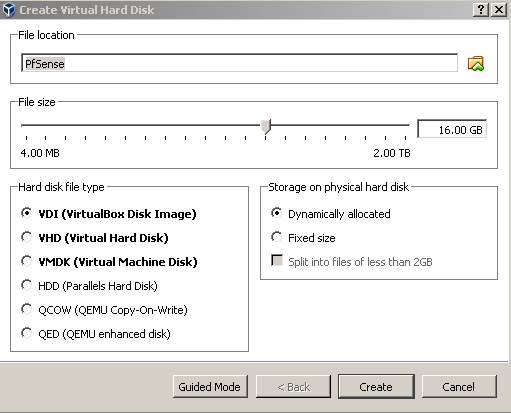
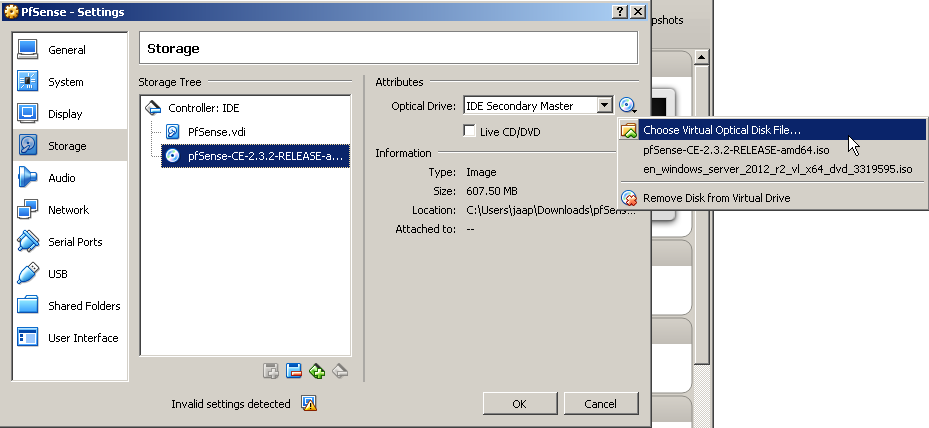
I like the suggestions on this next page so I’ll just go along with them. Next up we will mount the downloaded PfSense ISO and configure the VM’s network interfaces:
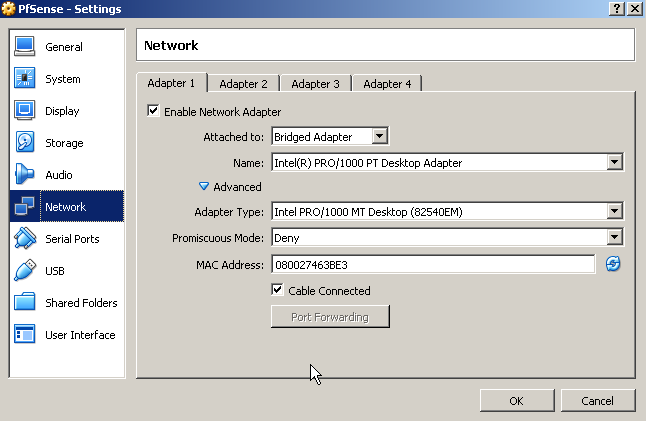
Network interface 1 gets configured as bridged to make it act like it is directly connected in your home network as per the diagram above. Network interface 2 gets configured in the internal network to allow access for the other internal VM’s through the PfSense VM. Now it’s time to start up your new VM and do the PfSense installation. The hardest part is to pay attention and bash the “I”-key at the right time:
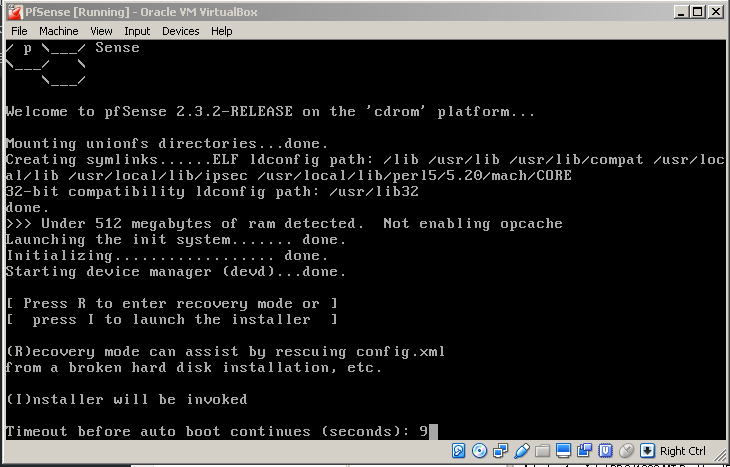
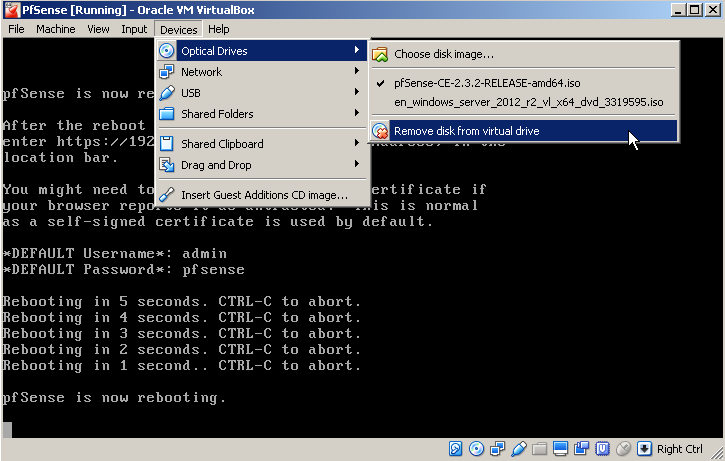
The rest of the installer is fairly straigtforward. I use default settings and run the Quick/Easy Install. When the installer is done you select the option to reboot the VM and at that moment you unmount the ISO like in this screenshot:
After the reboot the freshly installed PfSense starts up. If everything has gone successfully the VM will configure it’s two network cards automagically:
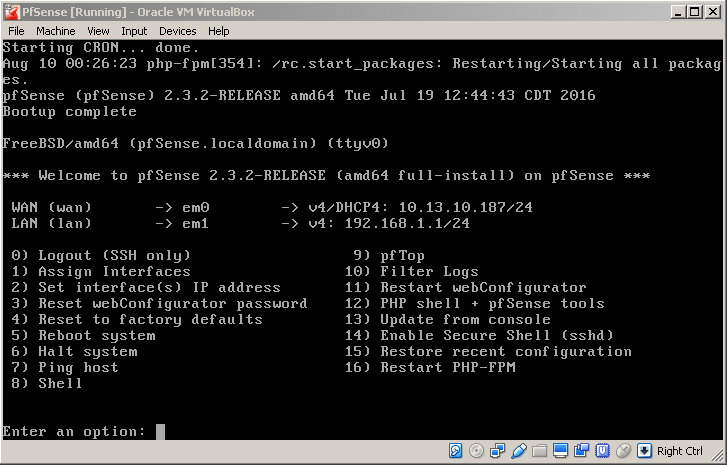
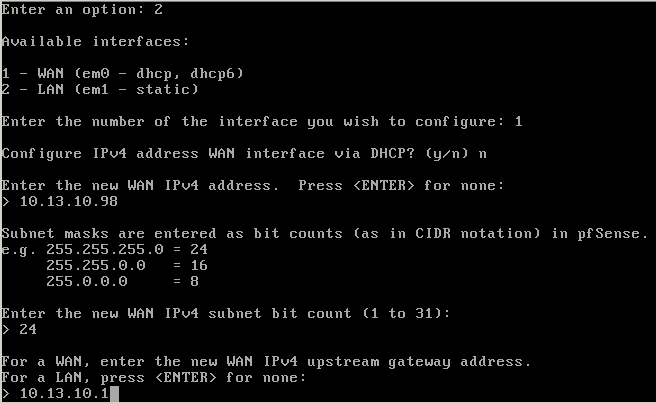
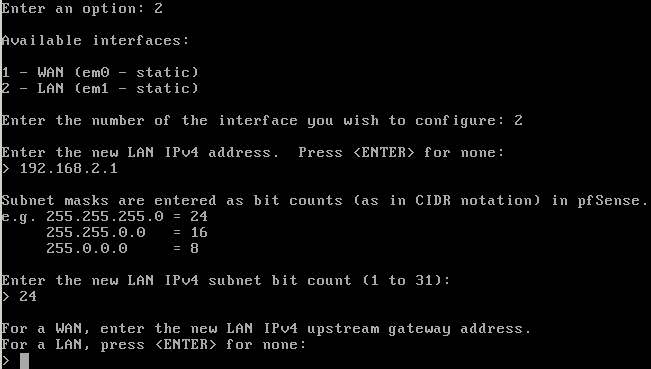
If you’ve followed the instructions, the WAN (external) interface is connected to Network Adapter 1 in VirtualBox, which connects to your home network. Please note that the subnet of my home network in use in my examples is 10.13.10.0/24, which is rather unusual. It is more common to find 192.168.1.0/24, for example. Adapter 2 becomes the LAN (internal) interface for the isolated lab environment. You can use the defaults but I recommend setting a static IP on the WAN interface, outside of the DHCP scope of addresses that your router distributes. You can do this by selecting option 2 from the menu and setting the options that fit your network:
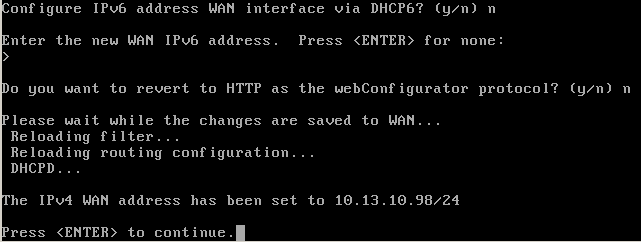
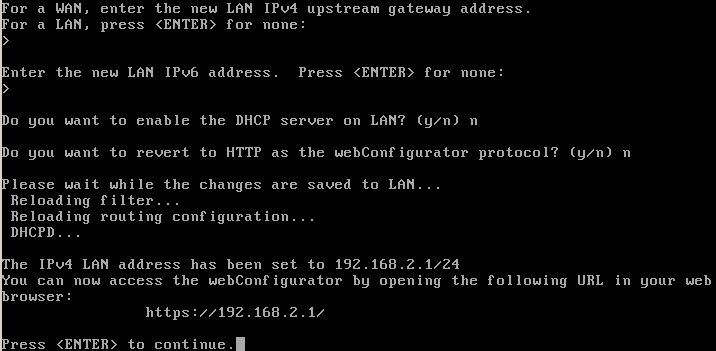
After the last part, your new address should be configured:

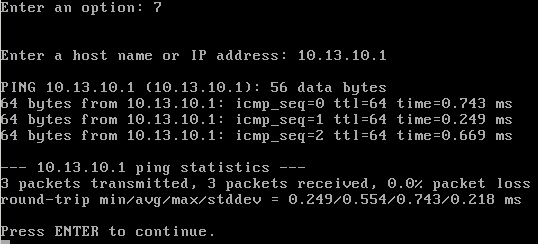
You can now test the configuration by selecting option 7 and using ping to reach your gateway and something on the internet, in this particular case a DNS server from Google:
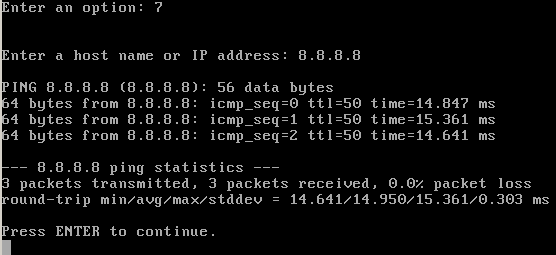
If you get replies to your ping from each then it’s all good. If 192.168.1.0/24 is your home network, then the LAN interface address should be changed as well to avoid overlap and make the routing impossible. I’ve changed the subnet to 192.168.2.0/24 in this example:

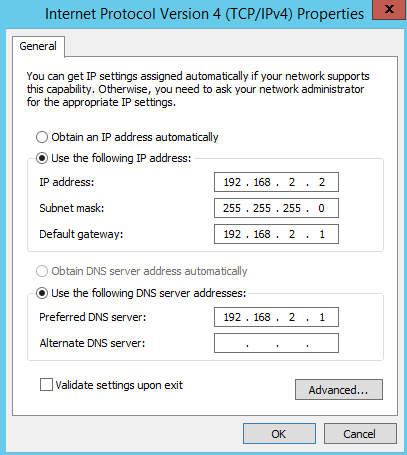
When this is done, your internal network should already be fully functional. We choose to keep the DHCP server disabled as you probably want to run it on a Windows Server as part of your lab. The next step is to configure the network interface from your first Windows Server virtual machine to become part of the right subnet:
Now we test again, pinging our local gateway and something on the internet:
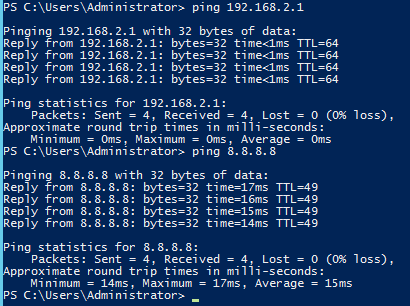
Again, if you get replies, it’s all good this far. Please take heed of two things:
- If you try to test a ping the other way, for example from your PfSense internal address to the Windows Server VM, make sure the Windows Firewall permits this by allowing IPv4 echo requests and IPv4 echo replies, or turn it off. If you don’t, you might waste time trying to troubleshoot in other places. A modern Windows installation doesn’t respond to ping by default.
- Using PfSense as the internal DNS server doesn’t work yet at this moment, more configuration is needed. You might point DNS to your home router, your provider or some other address on the internet, or just configure Windows Server as a proper DNS server like you need for everything in your lab anyway.
Open a browser on the Windows Server VM and point it to the PfSense internal URL: https://192.168.2.1. After entering the default credentials (admin:pfsense) a wizard is started:
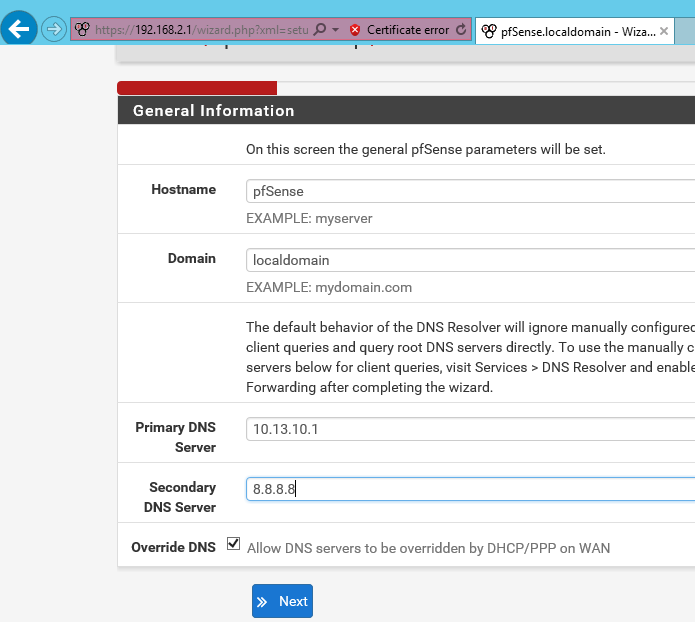
Most of the wizard is straightforward. I used the defaults almost everywhere and just did next, next, finish.. Except for the screenshot above, the admin password and the following setting which is important:
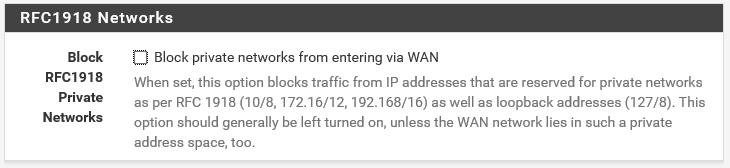
Uncheck this box to allow internal subnets as defined in RFC1918 to be passed through the WAN interface, otherwise PfSense won’t work as a part of your home network. When you have completed the wizard, the PfSense VM will answer DNS queries as well. A bit more configuration is needed to get everything working properly. First, we need to add a rule that allows us to test with ping through the PfSense, from the home network to the lab network. Go to Firewall > Rules and click the add button on the WAN tab:
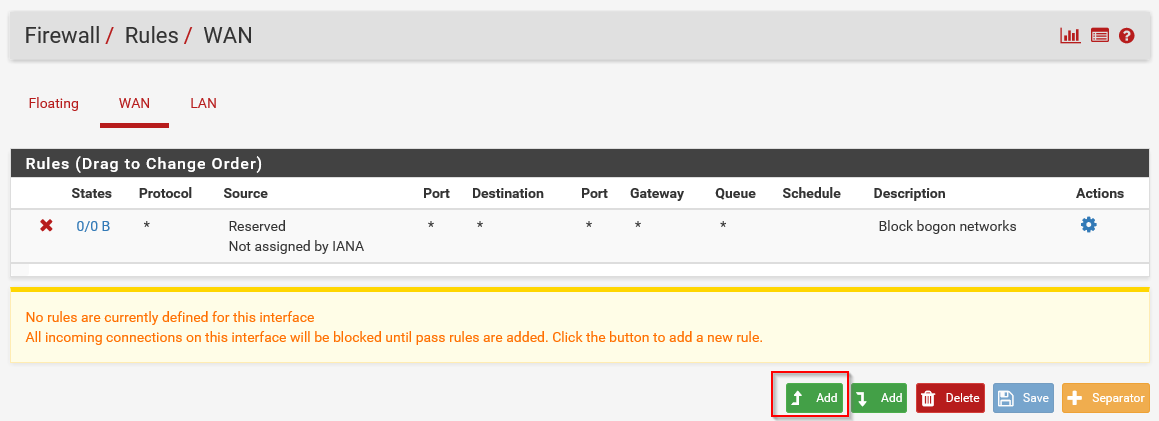
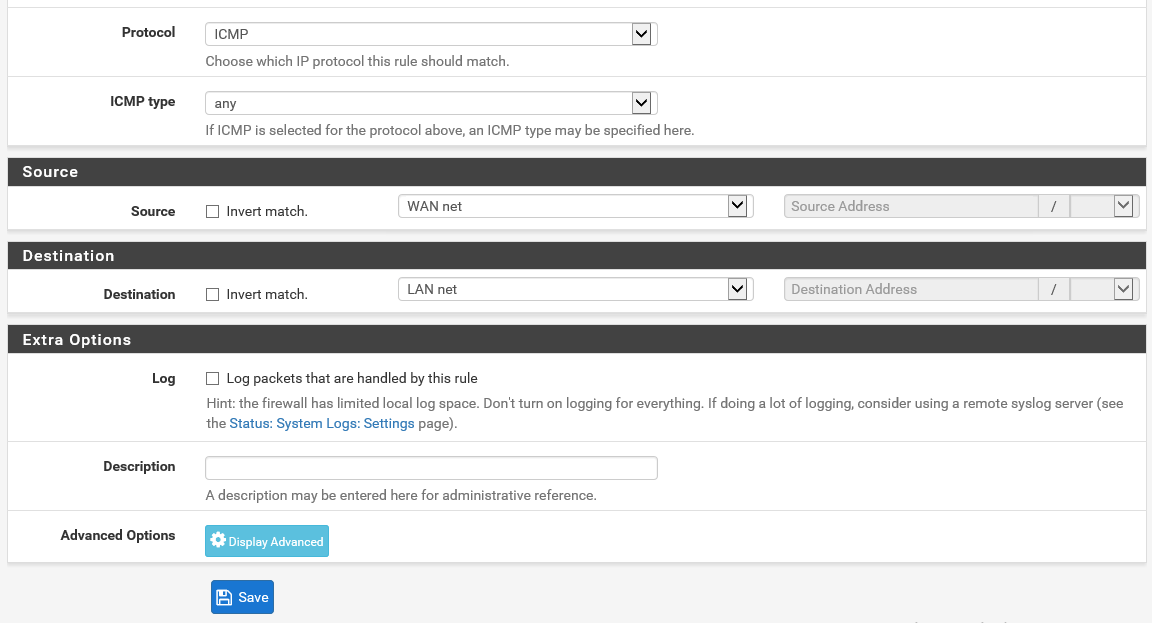
On the next page, fill in the following options and leave the rest alone:
Protocol: ICMP (ICMP is the protocol that ping is a part of)
Source: WAN net
Destination: LAN net
Click the Save button after that.
You will be asked to apply the rule changes after clicking the Save button, and you should. One of the last configuration parts left is telling (systems in) our home network how to reach the new lab network. A typical system in a home network knows only its own subnet and sends any packet destined for different subnets to the gateway. We have two options to tackle this problem:
- We can just tell our host Windows 7 OS where to find the new subnet. This one is the easiest. This post assumes a single computer lab so it should be sufficient in most cases.
- We can tell our home router where to find the new subnet. You have to get lucky here, if your home router does not allow you to add a static route then you’re out of options (or you should get a decent box since you’ll end up hating your old closed down piece of crap).
For now we will choose option one and add the static route to the Windows 7 host OS. Just do this from a command prompt:
route -p add 192.168.2.0 mask 255.255.255.0 10.13.10.98

You can inspect the routing table from the host OS with route print:
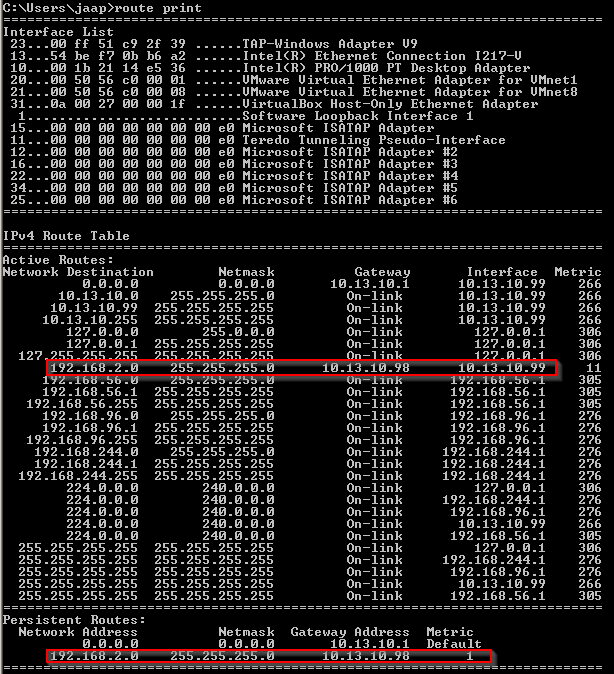
Now we can test reaching our internal Windows Server VM!
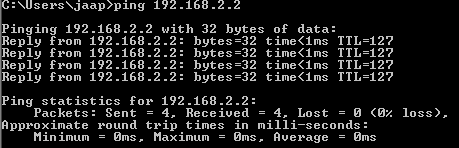
If you get a reply, you’ve successfully set up the network and with that the lab environment, congratulations! If you’ve made a mistake (or you’re cleaning up the lab) you can get rid of the static route like this:
route delete 192.168.2.0
The final step is to turn on RDP on the Windows Server VM, and to create a rule that allows us to make RDP connections from the WAN to the LAN subnet. To do so, add another rule under the WAN tab with the following configuration:
Protocol: TCP
Source: WAN net
Destination: LAN net
Destination Port Range: MS RDP (3389)
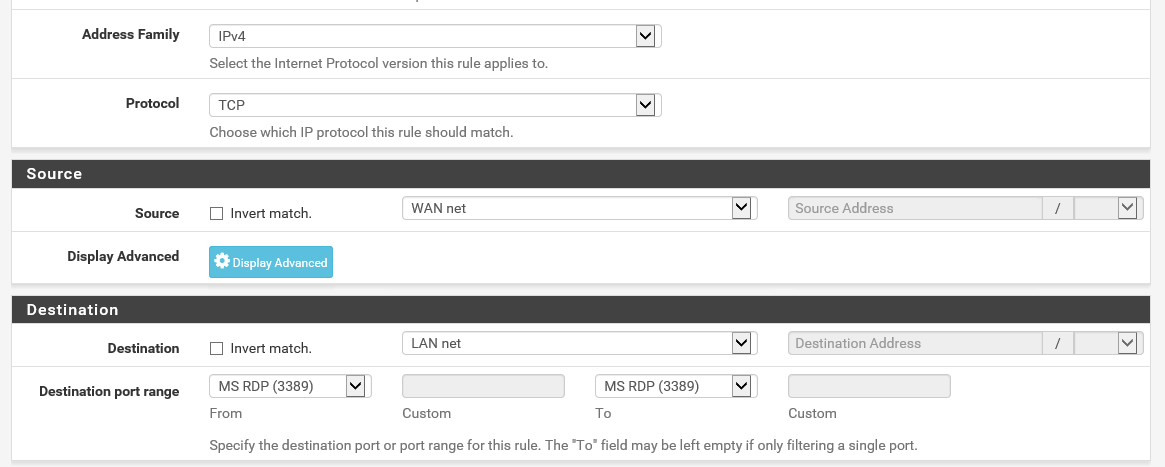
Fill in the configuration, click the save button, and apply the rule changes afterwards. You should now be able to make remote desktop connections from your host system to the internal VM’s:
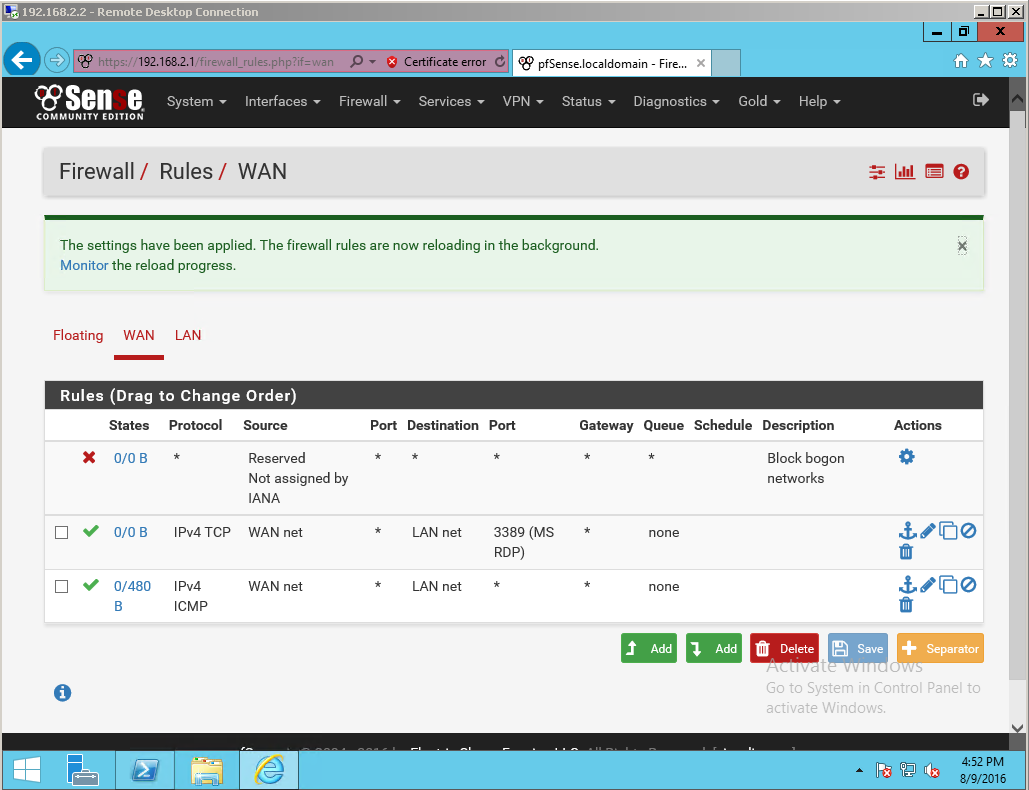
Connecting to your internal VM’s via RDP is a much improved way of working with them. The isolated network allows you to test whatever you want, including things like DHCP server(s), without influencing the rest of your home network. You can add the rest of the VM’s to the internal network in the same way, and the configuration that you’ve already put in place will make sure that it all works just like the first VM. I hope you’ve enjoyed reading this post. Please reach out on social media if you have any questions of comments.