Old Aerohive AP's for the home
Published on 2017-10-22Because I run a virtual firewall at home, I have to provide a separate wireless solution. I started out with a cheap Sitecom AP. Later, I swapped that out for a Linksys WRT54GL that first ran custom Tomato firmware and DD-WRT after that. The Linksys got replaced by a Ubiquity that I kind of liked but not that much. When I noticed Aerohive AP120’s and AP121’s can be had on eBay below 20 bucks, I knew what I had to do.
The requirements for my AP’s are simple. I want good performance and stability, an easy way to manage them, and support for roaming and multiple SSID’s in separate VLAN’s. The single Ubiquity AP setup I had could be extended with another one to support my requirements, but I don’t really like having to run software on a separate device to manage them. Besides that, I’ve had to kick the AP a couple of times over the past year because of stability issues.
I’ve looked into buying second hand enterprise gear before but it always seemed too pricey for a home solution. Another disadvantage is that most enterprise solutions require a controller to be available to support features like roaming. I have good experiences with a Ruckus outdoor setup but their code support for older generation models gets dropped pretty quick and the second hand gear could still be expensive. Also, the controllers can’t handle newer software releases very well performance-wise. I since learned that Aerohive AP’s only use the controller for management, not live support of features like roaming. You can get around the controller requirement for management by configuring the AP’s manually via the CLI. A couple of manually configured AP’s provide a proper ESSID without having a controller!
The Aerohive AP’s run their own HiveOS which seems pretty decent in practice. The OS provides management and basic networking capabilities. I’ve seen some enterprises use Aerohive products that they’re happy with. In general HiveOS and related products are a good experience to manage.
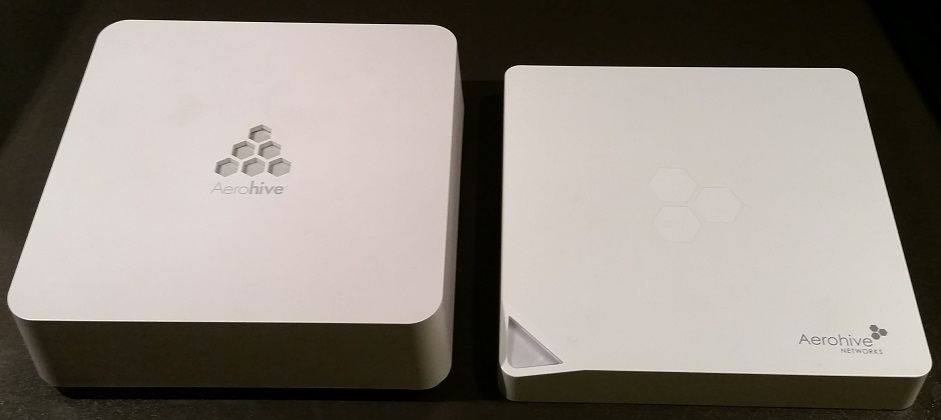
I started with three AP120’s when all the other models were still too expensive. The AP120’s lack a console port though, being managable only via IP. I don’t like the lack of a console port when you want to actually view what’s going on with the AP, or when troubleshooting. On top of that, the AP120’s made an annoying coil whine noise. I used them with PoE injectors so I don’t know if attaching a separate power adapter would make a difference here. After their price dropped, I bought three AP121’s. The AP121 is a model with similar features but is a slim, better looking model that includes a console port.
Both AP’s can take 802.3af compatible PoE injectors or use a separate power adapter. Be sure to use the right specs, they are available here and here. I like to use the PoE adapters so I got a couple from a local store for about 20 bucks each.
Both models still receive firmware updates from Aerohive. The product lifetime information is available here. The AP120 will continue to receive updates until October 2018, the AP121 will receive updates until August 2022. With the recent vulnerability KRACK being in the news, this is good to know. Aerohive actually already released an update fixing the vulnerability for most of their products, including the AP’s discussed here.
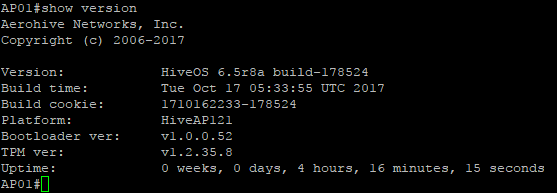
Firmware upgrades work smoothly. I did them via TFTP after having the AP’s live in my wireless network already. I was working via wireless from my laptop and first upgraded the first AP, followed by a reboot. When it came back, I did the same thing to the second AP. The roaming made sure my laptop stayed online during the entire procedure so that was cool to see. The firmware version containing the fix for KRACK for these models is 6.5r8a. You’ll need a firmware image specific to your AP model.
One gripe I have with the AP121 is with the status LED, or with the fact that the color stays amber, to be exact. I’ve found some information regarding the LED colors on this page and also on a couple of forum threads, but I wanted an official doc as a reference. The link provided is information for the AP330 and AP350 but the colors seem the same. Here is an FAQ entry from an official rep giving some specific info for the AP121. The amber color seems to indicate something to do with hardware, firmware or CAPWAP connections. I use the AP’s without CAPWAP connections and for the rest the devices seem to be functioning properly in all ways. I can’t even find anything strange in the logs or show command output. I guess I will just have to live with the amber color.
Another minor nuisance was that saving the running config sometimes didn’t retain it after a reboot, leaving me with an almost empty running configuration after doing a lot of setup tasks. I now got into the habit of saving the running config to the current config and to the bootstrap config. I didn’t lose any more config again but I’m still paranoid.
Setup instructions
The first thing you want to do when deploying second hand AP’s is start with a clean configuration. You hope that a company selling off older network equipment would have the common sense to clear the device configuration, but you might have to do it yourself. Just hook up the AP to a power source, let it boot and then hold the reset button for at least 10 seconds.
After a reset, the AP120 will try to find a DHCP address. I set them up by connecting the AP to my laptop and have the laptop run a local DHCP server on the interface connected to the AP. The AP will grab an IP, you can find that AP in your DHCP server logs and then connect to it via SSH. An AP121 has a console port which makes life easier but the reset procedure is still the same. After the reset, the default credentials for the devices will be admin:aerohive.
The next thing you’ll want to do is make sure that the firmware is up to date. You can view the firmware version with show config running. I switch the AP’s over to a static IP first (I also set a hostname at this point and remove any leftover hivemanager config), then run a TFTP server on the laptop connected to the AP’s ethernet port and run the following commands. Be careful with the TFTP command, it makes use of a colon in a place that looks strange to me:
no hivemanager
hostname AP01
interface mgt0 ip 192.168.1.200 255.255.255.0
ip route net 0.0.0.0 0.0.0.0 gateway 192.168.1.1
save config running bootstrap
save image tftp://192.168.1.100:/AP141-6.5r8a.golden.img.S
After the firmware upgrade finishes, you can reboot the AP with the reboot command. When the AP is back up again, view the firmware version and the running configuration again to verify things.
After doing the upgrade and having some basic configuration in place, it’s time to set the AP up for what it’s supposed to do in the first place. My sample configuration is available on GitHub. In my case, I’ve got two layer 2 domains (VLAN’s) that I want to provide wireless access to. The management of the AP is placed on a third VLAN. I configure the AP for management on an untagged or native VLAN and provide tagged access to the other two VLAN’s. My example contains two SSID’s that provide access to the tagged VLAN’s. The required configuration to achieve that is a bit counter-intuitive, so here is how it breaks down:
- You start by declaring two user-profiles that are required to supply a VLAN ID to a security object
- Next, you declare a security object that contains settings that will be applied to an SSID. In this example, those settings are for WPA2-PSK and for applying the VLAN ID only
- Then, you declare an SSID that has a security object and optional other stuff applied to it
- Finally, interfaces are set to provide access to specific SSID’s
The user profile configuration looks like the following snippet. Don’t mind the default QoS policy that’s specified. It’s mandatory for the command but the configuration doesn’t actually apply any changes to your traffic in this form. The rest of the command specifies VLAN ID’s and sets attributes that will be used later on to match these user profiles to security profiles. You’re evil if you don’t match the VLAN ID numbers to the attribute numbers.
user-profile network_five qos-policy def-user-qos vlan-id 5 attribute 5
user-profile network_six qos-policy def-user-qos vlan-id 6 attribute 6
Next, we need to specify the security objects. To begin, you just type the name so the object gets created. Then, you apply the WPA2 settings followed by specifying the user profile by its attribute number:
security-object network_five
security-object network_five security protocol-suite wpa2-aes-psk ascii-key *
security-object network_five default-user-profile-attr 5
security-object network_six
security-object network_six security protocol-suite wpa2-aes-psk ascii-key *
security-object network_six default-user-profile-attr 6
With all the user profiles and security objects available, the SSID’s can be declared. You start with just a name again, to create the SSID. After that, you apply the security object. Note that one SSID has the hide-ssid option set, so the name is not broadcasted. The bit about inter-station-traffic provides wireless client isolation for the SSID. The last line sets the allowed data rates for 802.11g connections. There’s one base data rate that counts as the minimum, and all the other values are allowed too. Connections on lower data rates take up more airtime than higher data rates to tranfser the same amount of traffic. Allowing data rates too low can mess up your wireless performance for all connected clients. For 802.11n data rate settings are not relevant because the protocol works in a different way.
ssid network_five
ssid network_five security-object network_five
ssid network_five 11g-rate-set 18-basic 24 36 48 54
no ssid network_five inter-station-traffic
ssid network_six
ssid network_six security-object network_six
ssid network_six hide-ssid
ssid network_six 11g-rate-set 18-basic 24 36 48 54
Finally, the SSID’s have to be applied to your radio interfaces. There are two interfaces, for 2.4 GHz and for 5 GHz, times two SSID’s, so four commands in total:
interface wifi0 ssid network_five
interface wifi1 ssid network_five
interface wifi0 ssid network_six
interface wifi1 ssid network_six
The steps above will provide a working standalone access point providing access to the two different networks via different SSID’s. The whole idea here was to have two AP’s working together without a controller. To do that, just configure the two AP’s with the same settings, providing access to the same networks with the same configuration and passwords. Once you’ve done that, there are a couple of extra steps to get the AP’s to work together:
- Configure a hive with a password
- Enable the hive on your management interface
- Set the radio channel used for communication between AP’s to the same channel
These AP’s have interfaces on 2.4 GHz and on 5 GHz. Note that the 2.4 GHz interface is called wifi0 and the 5 GHz interface is called wifi1. One 5 GHz channel will be used for communication between the AP’s. You have to set it to the same channel for the AP’s to see each other. The required commands are as follows:
hive home
hive home password ***
interface wifi1 radio channel 36
interface mgt0 hive home
After doing all this configuration, the example on GitHub still has some remaining config lines left that I’ve not discussed here. Most of them are self-explanatory, like the NTP and DNS lines. DNS in the example is pointed to the OpenDNS servers for some scrubbing of malware related connections by default. The only other line worth mentioning disabled CAPWAP tunneling because the setup in my example implements what’s known as a local breakout setup, where connecting to an SSID provides access straight into the layer 2 domain when entering the VLAN from the access point.
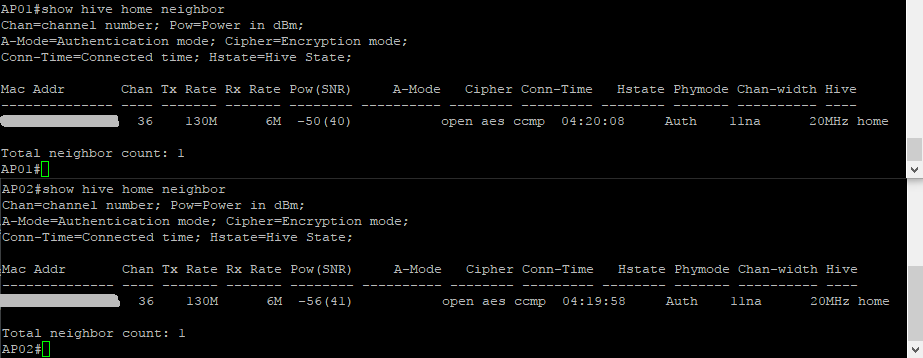
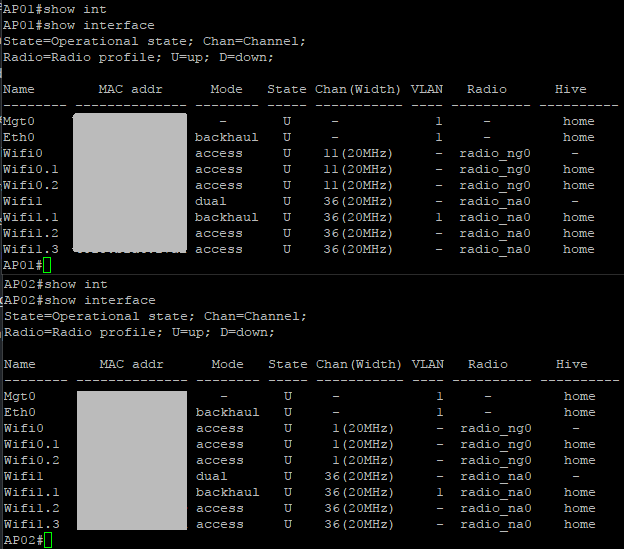
The AP’s can see each other:
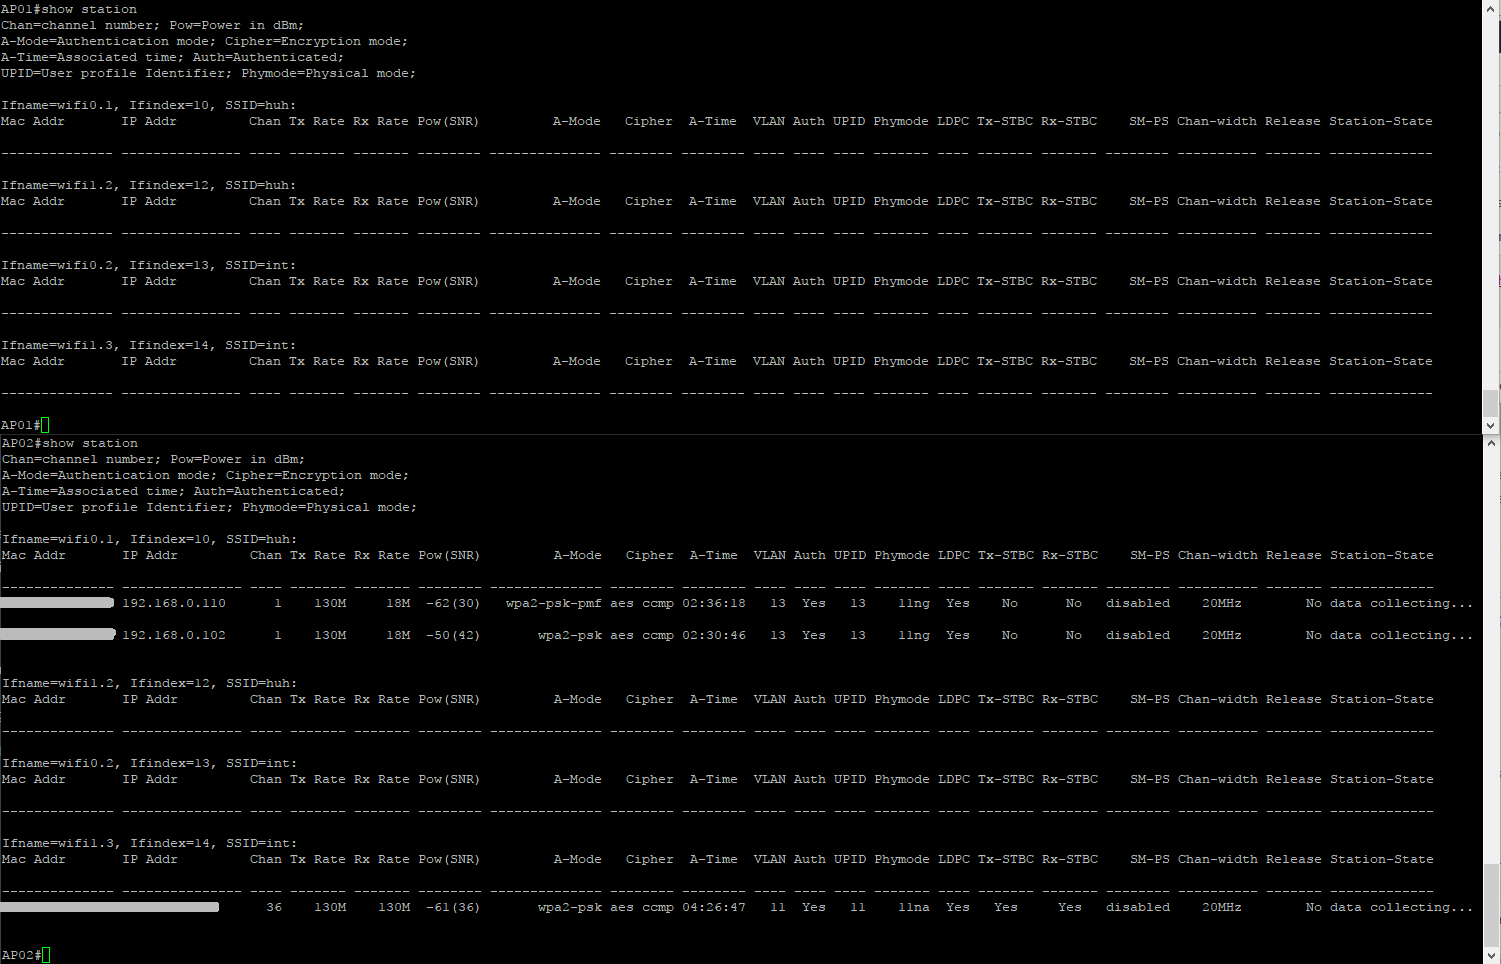
There’s some information available on connected clients via show station:
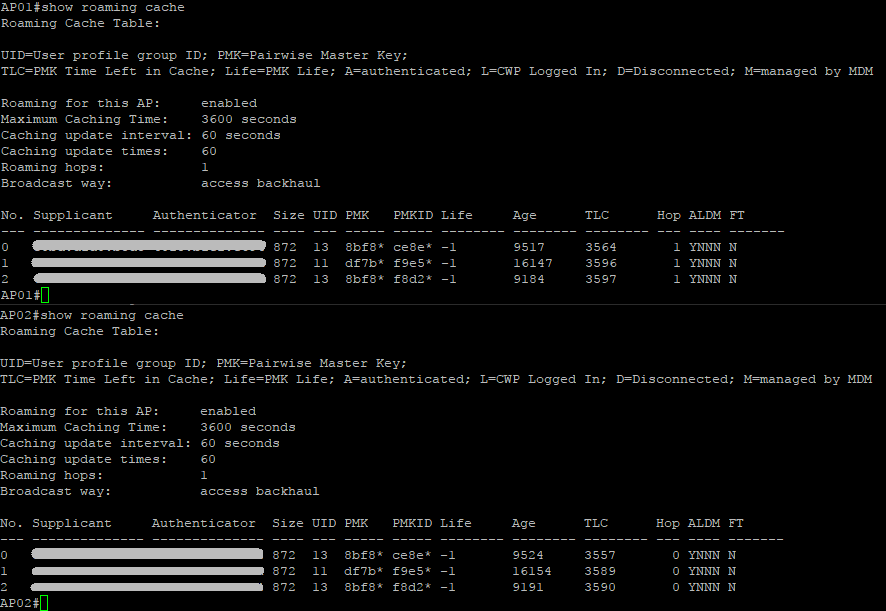
You can also view some information about interfaces and some roaming stats:
Most of the information I needed was found in these two blogs as well as on the Aerohive forums. The official CLI reference that is compatible with the firmware versions discussed in this post can be found here altough it is for the AP230 model. Some details like commands for dimming the LED may be a bit different. Apart from the sources I’ve already named, official documentation about how the specific Aerohive intricacies work has proven a bit rough to find.
I use the setup as described to provide wireless access to an internal network, and the other network is for guests and provides internet access only. Having this setup, there’s one more thing on my to do list and that is setting up a RADIUS server to provide 802.1x access. I am still looking for an elegant solution to bring that capability to my home network, preferably in the form of a single virtual machine. More suggestions are welcome. Thanks for reading a Conproly post. Please feel free to reach out on social media if you have any questions of comments.