Networking Labs with Vagrant
Published on 2017-11-07Vagrant is a word that I’ve heard from time to time over the last couple of years. I knew the high-level concept but never really saw a use case, until now. My previous project had me setting up a VM on an ESXi box, taking a snapshot of a clean install and manually restoring the VM to the snapshot state every time I wanted to do a new test of my code. Standing up a single VM with a single snapshot isn’t that bad but it doesn’t scale. My next step is standing up labs with multiple machines. Vagrant can support a sensible workflow for those labs. Read on to find out why and how.

My motivation to learn more about Vagrant isn’t just for the projects I want to do right now. I have a feeling it can help out with future learning endeavours as well. I want to be able to build network topologies that consist of unix based devices, hooked up in a certain way, then apply some configuration and test the behavior. This capability will allow me to standup the following topology, for example:
client1 <-> fw1 <-> router <-> fw2 <-> client2
This topology can then be used to test things like site-to-site VPN tunnels or maybe a simple routing protocol. Once you’ve got the basics you can of course easily change the topology to whatever you want and try out different things. My own use case right now is to be able to learn about OpenBSD networking features while deploying everything in an automated way with Ansible. Over the course of the past two years, projects like this have had me studying topics like OpenBSD, Linux, Git, Ansible, pf, Python, Jinja2 and now Vagrant. The experience with automation, Linux and networking concepts has proven beneficial in my day job too, where I see more traditional enterprise networking technologies like Cisco and HP based campuses and products from Microsoft, VMware and the common firewall vendors in the datacenters. An example of such a benefit is working with reverse proxy features and TLS certificates on FortiGate firewalls and Citrix NetScalers. I came across Apache, HAProxy and nginx on Linux and FreeBSD and the conceptual knowledge I gained helped me on the job. I believe open source networking knowledge like this will prove more useful in the future for a larger crowd of networking engineers than has been true in the past.
Some more inspiration for Vagrant came in the form of an example by Attilla de Groot who works for Cumulus and explained he stands up Cumulus topologies with Vagrant to test things. Another idea that’s on my list is to use Vagrant to build this project by Vincent Bernat where he builds a route based IPsec VPN topology on Linux. Maybe cooking up something using FFR would also be fun.
Some Vagrant basics
Vagrant can be seen as a wrapper or CLI tool around a hypervisor. You create a file called the Vagrantfile that contains your instructions to build one or more virtual machines, then you use the Vagrant CLI to build those VM’s, connect to them via SSH or destroy them again. Some of the hypervisors that Vagrant can work with are VirtualBox, libvirt and the VMware desktop solutions (Workstation and Fusion). Hypervisors are called providers in Vagrant terminology. Most of the Vagrantfile instructions you would use to manage specific VM settings are provider-specific. I haven’t done a lot with that yet as I wanted to keep the code in my demo hypervisor-independent. One handy feature I did come across was the instruction for VirtualBox to start the VM’s windowed with the GUI, as Vagrant starts VM’s headless by default.
I used the Getting Started pages that do a good job of explaining what Vagrant is all about, how to use it and what your options are. I also used information from the docs, like the pages about networking, providers and multi-machine configuration. Besides those sources, I googled a lot of random stuff to get my tests set up the way I wanted.
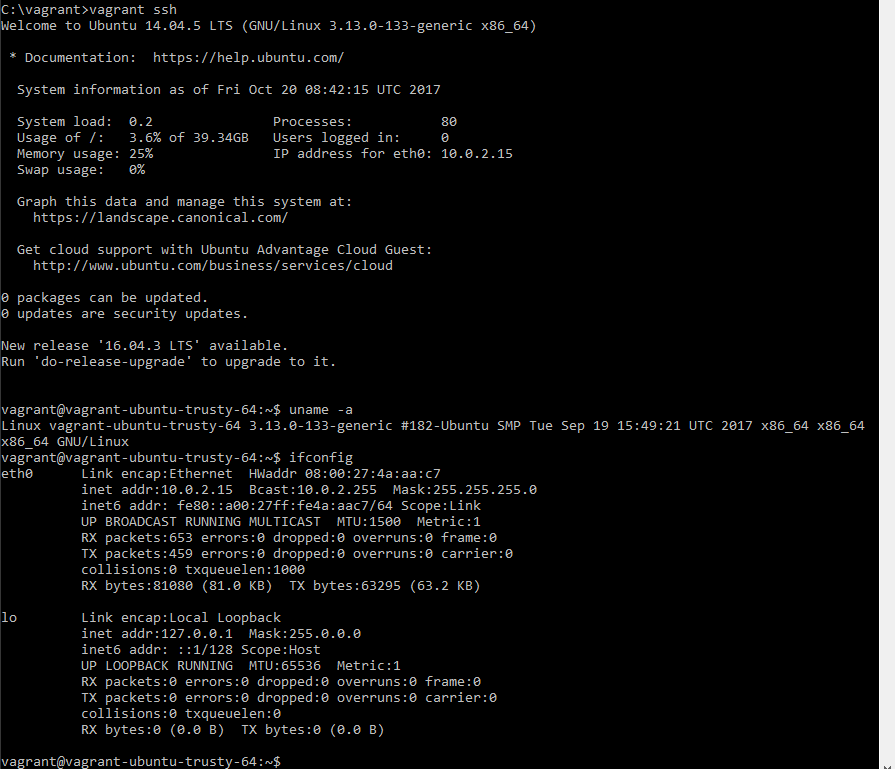
I grabbed the latest versions of Vagrant and VirtualBox on my Windows 10 laptop to get started. The easiest way to start is to run VM’s provided by Vagrant from their library. Those VM’s are called boxes and the library can be found here. I think the Ubuntu Linux distro’s are most commonly used with this stuff so I gave the box ubuntu/trusty64 a try (that’s Ubuntu 14.04 LTS). Keep in mind that not every box available will work well with all the hypervisors.
The next thing to do is to place the Vagrantfile in a directory (I used C:\vagrant\Vagrantfile) and add some instructions to create a VM. The contents of one of my first Vagrantfiles looked like this:
# -*- mode: ruby -*-
# vi: set ft=ruby :

Vagrant.configure("2") do |config|
  config.vm.box = "ubuntu/trusty64"
end
Next, you open a CLI, go to the directory containing the Vagrant file, and run the command vagrant up. Now you might not have the actual box to build the VM from on your system yet. The Ubuntu box that’s specified in this example is available by default from the Vagrant Cloud library and will be downloaded if necessary. The command will build the VM and output some logs about what’s happening.

You can now connect to the machine from your CLI by using the command vagrant ssh. This will get you into the machine, where you can basically do anything you want like with any VM.
If you want to remove the VM from your system you can use vagrant destroy -f. If you want to reload the VM without destroying it first you can use vagrant reload. It’s worth reading the Vagrant documentation for all your options here.
The next thing to figure out is how to do some networking. By default, Vagrant provides each machine with a network interface configured with NAT to your host. This interface is required because Vagrant communicates with the machine on it. On the machine, this interface is configured as a DHCP client. For networking labs, you will want to add additional interfaces. Vagrant provides three types: an interface using port forwarding, an interface connected to a private network (comparable to a host-only network) and an interface connected to a public network (the public network being the rest of your network outside of your host, making use of bridging to an interface on your host). I am interested mostly in private networks for the kind of labs I have in mind. You can add a private network interface with the following config in your Vagrantfile:
Vagrant.configure("2") do |config|
  config.vm.box = "ubuntu/trusty64"
  config.vm.network "private_network", ip: "192.168.100.100"
end
When configuring private or public networks, be careful not to overlap any address space that might be configured anywhere on your host under some virtual interface. Having overlap might result in Vagrant noticing it and complaining during the building of your machine. I try to use address space that’s random enough not to be in the way. By the way, it seems that Vagrant treats any declared networks as a /24 by default.
One networking annoyance I had later on was with the default route to the NAT interface being injected because a default router is learned via DHCP from the Vagrant environment. On most unix like OS’es this DHCP-learned default route overrides any manual config. You can’t mess with the NAT interface because it’s required by Vagrant to manage the box. What’s more is that it also seems Vagrant will connect different boxes to each other via this default gateway, even if their IP’s are on different subnets. This is unwanted behavior for networking labs where you might want to test some degree of isolation. I solved it by adding commands to delete the default route on the box and add a custom one. The commands get executed by Vagrant right after the box is booted. Vagrant uses SSH to do setup stuff like this, including setting the hostname and configuring the additional network interface.
A multi-machine setup alters your Vagrantfile a bit:
Vagrant.configure("2") do |config|
  config.vm.define "client1" do |client1|
    client1.vm.box = "ubuntu/trusty64"
    client1.vm.network "private_network", ip: "192.168.100.100"
  end

  config.vm.define "client2" do |client2|
    client2.vm.box = "ubuntu/trusty64"
    client2.vm.network "private_network", ip: "192.168.100.200"
  end
end
This Vagrantfile will boot two machines, which you can reach like this: vagrant ssh client1, for example. Be careful to place the config to create network interfaces under the block where the machine is defined in your Vagrantfile. If you place the directive in the main code block, the interface declared there will be added to every machine (having the same IP address each time).
Another Vagrant feature worth mentioning is synced folders. Linux-based boxes play nice with Vagrant, providing a mount on the machine under /vagrant directly to the directoy where you have your Vagrantfile. This means you can have additional helpful files like config files and scripts in this directory and they will be immediately available on your box. On my Ubuntu box this feature worked by default. On my OpenBSD box I couldn’t get it to work quickly, apparently it doesn’t work as good with BSD based boxes.
I expanded on the basics as explained above by creating two simple demo projects that can be built on. The first is a 3-node Ubuntu topology and the second is a 3-node OpenBSD topology. I had a couple of learning experiences trying to get the boxes to behave as I wanted. Those experiences are worth sharing so I placed my code in this GitHub project and provided my findings with both setups below.
Ubuntu demo
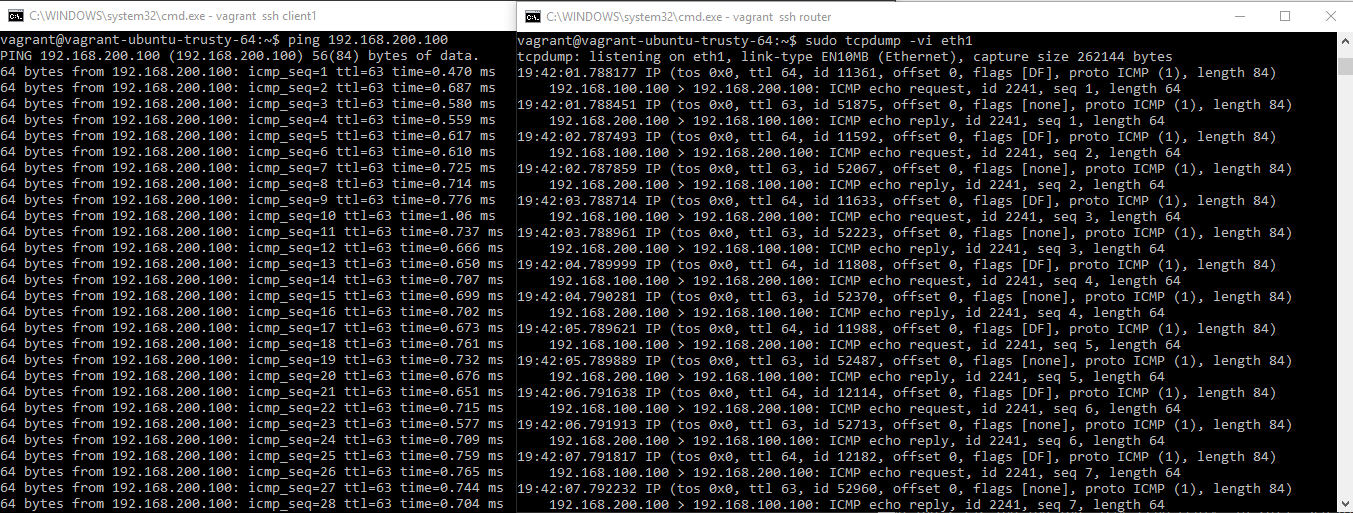
Building the Ubuntu demo is quick and easy after testing out the basics as described above. I ended up with this Vagrantfile that provides the following topology: client1 <-> router <-> client2
Both clients have their default route pointed towards the router. The router has IPv4 forwarding enabled so the clients can reach each other through the router. The only new directives in the Vagrantfile to accomplish this are shell commands to be executed after the VM boots. These commands are executed by Vagrant with sudo. Depending on which box we’re talking about the commands do the following things:
- Delete the default route
- Add a new default route
- Enable IPv4 forwarding
- Echo some output that will be visible in the output from
vagrant up, which I like to do to keep track of things
I ran into a big gotcha with my first couple of tests here. You need to watch out for the fact that VirtualBox will create a virtual network interface on your host device for each virtual network that you declare in your Vagrantfile. This virtual network interface has a default IP. As the Vagrant networks are all /24’s this IP will always be .1 and can interact with the Vagrant environment from it. Good for SSH and Ansible but bad if you put machine IP’s on this same IP, you will get some weird ARP stuff going on and breaking things. I didn’t read this in the documentation anywhere so I count it as a pitfall.
After configuring everything and bringing up the lab, everything works just fine pinging from client1 to client2 through the router:
OpenBSD demo
For my personal projects I wanted to see if Vagrant will be a good tool to support development. For that purpose I needed to see if OpenBSD will work as good as the Ubuntu demo above. It turns out that OpenBSD was a bit more of a hassle but after the initial hurdles, I got OpenBSD to work just as good. This makes me happy as it will allow me to do my OpenBSD labs quicker.
I selected this box from the Vagrant Cloud library because it seems well-updated and supports both VirtualBox and libvirt (I might want to use libvirt later instead of VirtualBox). I was able to boot the box and fiddle around with it, but when I started adding extra directives in my Vagrantfile, things broke down. Some investigation showed that both the sudo and doas features were broken on the box. Doas is an alternative for sudo on OpenBSD and Vagrant can use both but requires at least one. I fixed it by making the following edits in the machine (as root):
echo "#includedir /etc/sudoers.d/" > /etc/sudoers
touch /etc/doas.conf
echo "permit :wheel" >> /etc/doas.conf
echo "permit nopass keepenv root" >> /etc/doas.conf
echo "permit nopass keepenv vagrant" >> /etc/doas.conf
This fixed the sudo and doas functions for the box running right now, but after the next vagrant destroy/vagrant up cycle the edits would be gone. That’s why I looked for a way to make the edits permanent in the box so I can use them as a base in the future. It turns out that creating a new base box out of an existing one for use in your local environment is not hard at all. I used the following command to create a box file from the box containing the edits described above:
vagrant package --output obsd.box
This will place the file obsd.box in the same folder containing the Vagrantfile for the original OpenBSD box, where you run the vagrant commands. Now there’s one more command to run:
vagrant box add obsd obsd.box
This imports the new box into your local Vagrant inventory and allows its use in any project on your device. Working with this new base box I was able to use this Vagrantfile to build a demo similar to the Ubuntu demo before it. For this demo, the topology is as follows: client1 <-> fw <-> client2
The Vagrantfile for this demo works the same as the Vagrantfile for the Ubuntu demo, with just three differences:
- There’s a directive setting the hostname on the machines
- The commands being executed are tailored to the OpenBSD OS instead of Ubuntu
- The fw machine contains an additional network interface that’s bridged to an interface on the host device, with static IP
After booting the VM’s, the lab just works. Some details about the machines and the output of tcpdump while pinging through the fw machine are in the screenshot below:
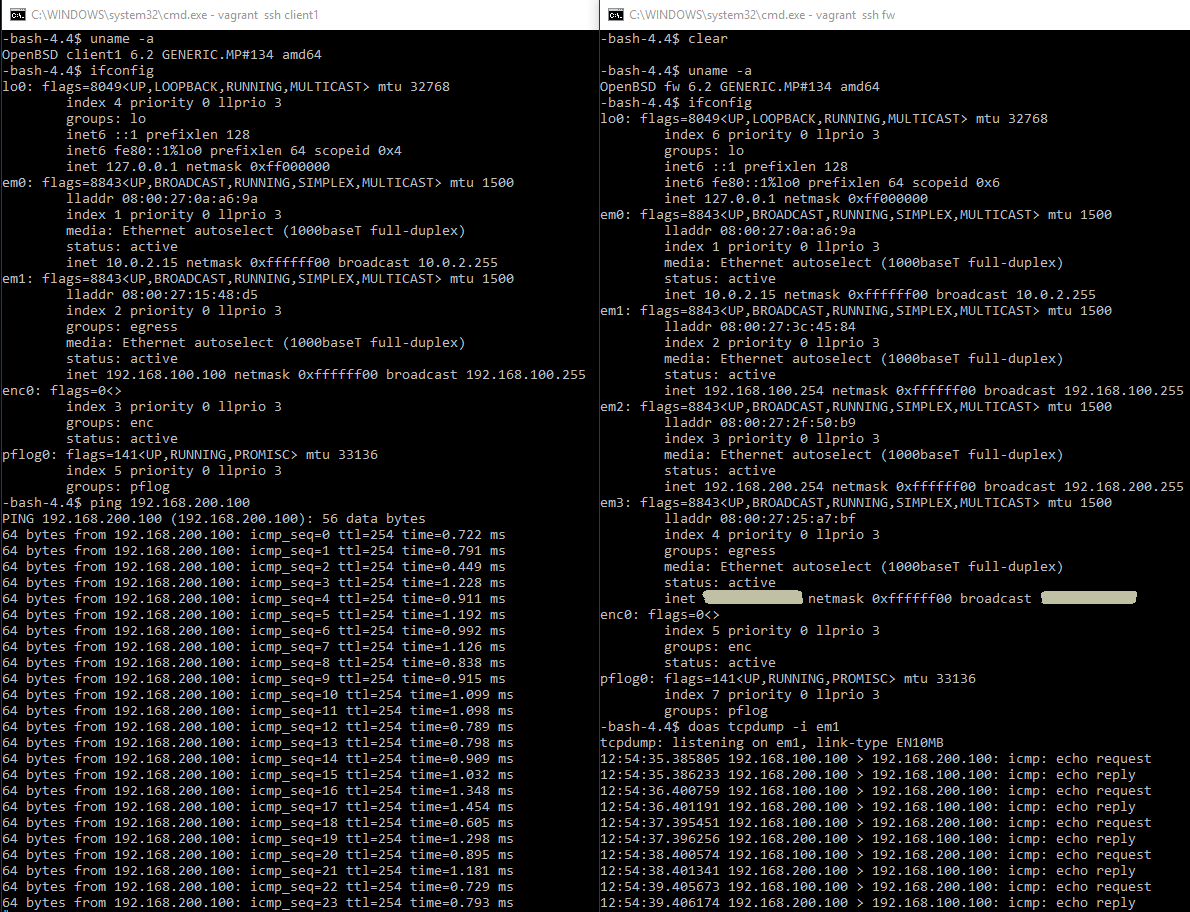
I like the default output of tcpdump on BSD compared to Linux. This should look familiar if you’ve done things with NetScalers.
Next steps
The next thing to do to get some real use out of Vagrant is to build some real labs using the technologies that you actually want to work with. To do that, you will want to make two kinds of modifications to the boxes: installing software and changing configurations. Depending on what you want to test you can make two choices regarding the software installation. You can either create a base box by using the procedure from the OpenBSD demo, first installing all the software and then creating the new box. The advantage is that you don’t have to go through (automated) software installations every time you stand up your lab. The disadvantage is that the software will already be there if you want to test automation code that includes software installs. The other choice you have is to somehow integrate automated software installation in the Vagrantfile. This can be done in a couple of different ways:
- By using shell commands with instructions for software installs
- By calling a bootstrap shell script that handles the installations for you. This works especially nice with Linux boxes that have the synced folder working, as you can place the script there and have it immediately available
- By using Ansible, which brings us to the next topic
Ansible
The combination of Vagrant with Ansible is nice for a couple of things. Ansible provides a more powerful means to manipulate your boxes than using setup commands and shell scripts. Vagrant supports calling Ansible playbooks directly from the Vagrantfile. For this feature to work, Ansible has to be available on the host system. On my Windows host, I’m not gonna bother trying to get this to work. The alternative is to use Ansible on another machine to connect to your boxes from there. If you want to do that you will need to make sure you can make a connection from your Ansible host to your Vagrant machines. Depending on where you run your Ansible host this means you will have to do something with host-only networking on your host device and bridge the boxes to that network, or bridge the boxes to your real network to reach different physical devices.
For my own setup, I am considering having a Linux VM with both Ansible and Vagrant inside. This will require nested virtualization support though, and that means VirtualBox is not an option to run the Linux VM on. On a Windows laptop, you could try using VMWare Player or Workstation, the last one requiring a license fee. I will probably move to a setup based on libvirt later. Vagrant can use libvirt as a provider instead of VirtualBox. This is interesting to me because I want to know how well OpenBSD runs on a libvirt hypervisor and learn more about the libvirt technology. The setup I have an eye on is a Linux VM with Ansible and Vagrant, running the boxes on libvirt.
Closing thoughts
I have a couple of closing thoughts that didn’t really fit into the rest of this post.
An important thing to note is that getting virtual machines to do your bidding like described in this article doesn’t pay any respect to good security practices. You should be conscious of the fact that deploying production services requires different handling and additional measures.
I looked at this GitHub project by Scott Lowe. He built this project to support his excellent session about Linux networking for a DevOps Networking Forum conference. There is one cool thing in his Vagrantfile where he uses variables from a YAML file to feed into the setup directives for the boxes. I will try to incorporate something like that in future projects.
A cool thing about some of the boxes in the Vagrant Cloud library is that they can have a version. You can use the version number in your Vagrantfile to use older versions of the box. I intend to use this feature to test performing OS upgrades on boxes. This would allow me to try out the behaviour and streamline the procedure for later use on production systems.
Thank you for reading an article on Conproly. Please reach out on social media if you have any questions of comments.