Configuring Aruba WLC With External Captive Portal
Published on 2020-07-16For a client who operates a campsite, I installed a new Aruba 7010 WLC with a few outdoor AP’s (AP375’s). The campsite runs a PfSense firewall that also serves a captive portal page for guest WiFi access. Getting the Aruba WLC to play nice with the external captive portal was not very straightforward. In this post, I explain the challenges I ran into and how to solve them.
The old wireless network runs on a Ruckus ZoneDirector WLC. Ruckus has changed ownership twice since we first built the old WiFi network, and their commercial strategies have not been friendly to my client. We have now chosen Aruba because their solutions meet the requirements for a competitive price.
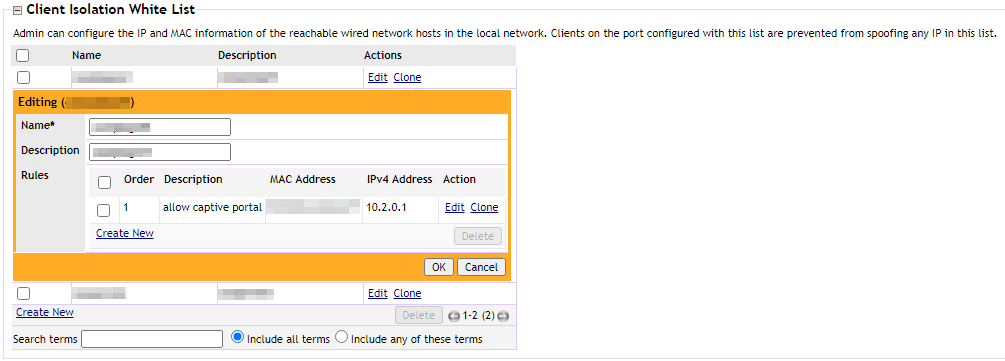
With the Ruckus WLC, because of the wireless client isolation feature, I had to whitelist the gateway IP that also serves the captive portal page. That piece of configuration was enough to get the WiFi network working with the external captive portal page.
With the Aruba WLC, setting up something similar is more complex. I wasn’t familiar with the required Aruba features when I started this project, so I had to figure out the details as I went along. The basic configuration of the WLC is pretty self-explanatory if you’ve worked with WLC’s and WLAN’s before. Configuring interfaces, setting up an SSID and bridging it into a VLAN works quite easy, and I like both the Aruba CLI and the web interface. I got stuck on the part where I needed to do something to get the SSID to work with the captive portal page served by PfSense.
My client requires a cost effective solution, so we only use basic licensing. Aruba sells additional licenses, like the PEFNG (Policy Enforcement Firewall Next Generation, that clears it up) license which has to be bought for each AP. If you don’t have the PEFNG license, you can’t manually configure the contents of roles and policies, which is what you’d normally do to configure the WLC to work properly with a captive portal. I didn’t think that the setup I had in mind would be very exotic, but it turned out to be quite difficult to find all the right information. It’s not that Aruba’s documentation is bad, it’s that the feature set is so extensive that if you arent’t familiar with it, just diving in and finding the right details for a specific setup takes time. Eventually, I found a few separate sources of information that helped me to put the right configuration together. Without a lot of knowledge about Aruba internals such as the built-in RBAC system, it was a bit confusing to plow through them, but here are the articles that helped me:
- Configuring Captive Portal in the Base Operating System
- Can we configure internal or external captive portal without PEFNG license?
- Captive Portal without PEFNG License on ArubaOS8
I obviously needed to read a lot more random information via Google than just those pieces, so here is what I learned. First off, configuring WLAN’s in the web interface works a little quirky on our version of ArubaOS (8.3.0.9). If I create a WLAN and set the Primary usage setting to Guest, the final step of creating the WLAN results in the following error:
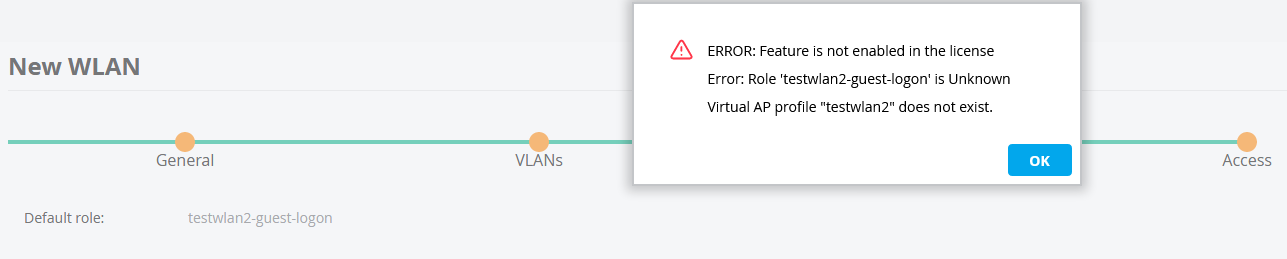
The CLI shows that somehow, some definition of the new WLAN is still being created, but it won’t show up in the WLAN list in the web interface, and some associated settings like a Virtual AP profile are not being created. Luckily, you can clean up this mess in the CLI by using the no wlan ssid-profile testwlan2 command (in this example):


Setting the Primary usage setting to Employee results in a different error but better behavior. The WLAN will now show up in the web interface and have all of its associated settings properly generated:
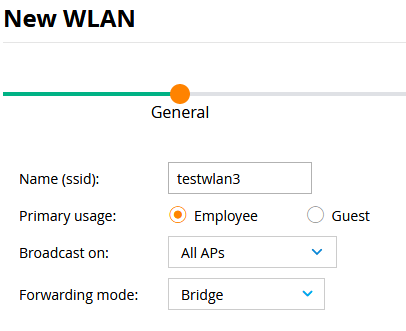

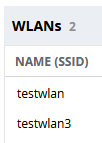
So I guess we will be working with the Employee setting. A funny detail is that the Ruckus WLC handles SSID names that include a ‘-sign without a problem, but on the Aruba WLC having SSID’s like that will mess up some CLI commands. With a WLAN successfully created, a few more puzzle pieces are needed to get the captive portal authentication to work:
- A captive portal authentication profile
- A user role for the captive portal profile
- An AAA authentication profile mapping the user role and thus the captive portal profile to a Virtual AP
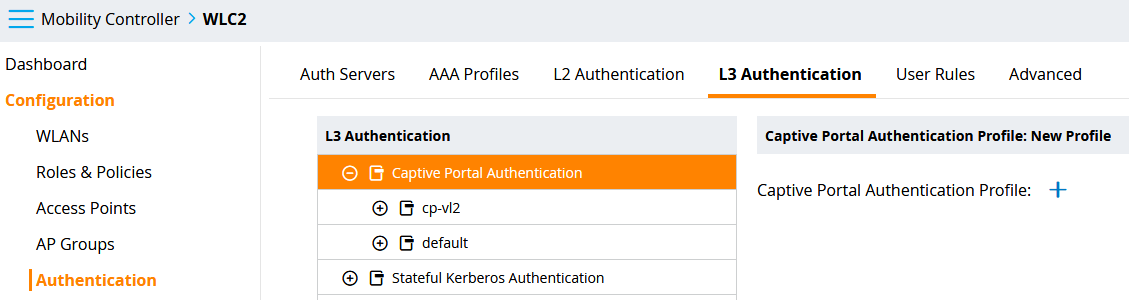
Luckily, some of the configuration pieces above get generated for us. There are multiple ways to configure a captive portal profile. You can configure captive portal settings while creating a WLAN, but I couldn’t get a working configuration thay way (possibly due to having no PEFNG license). So, I configured a basic WLAN, then manually created a captive portal profile. This stuff is hidden under Configuration -> Authentication -> L3 Authentication -> Captive Portal Authentication (click the + sign):
Creating a captive portal profile causes a role with the associated policies and rules to be created. The role name will be based on the captive portal profile name. Usually, these pieces of configuration get applied to a captive portal running locally on the WLC itself. It’s possible however to provide the URL of an external captive portal in the Login page: setting. In this case, I just specified the PfSense captive portal URL: http://10.2.0.1:8002/index.php?zone=camping_zone and that did the trick. The Welcome page: setting can be left on the default value, because the Show Welcome Page: setting gets disabled. The welcome page would be served by the WLC, and you don’t want that when using an external captive portal. My profile is named cp-vl2 referring to the captive portal profile for vlan2, but you can name this however you want. The Redirect Pause: setting will be lowered from 10 to 1, because network users are needy at times and we wouldn’t want any additional delays. The rest of the settings are all left at the default values (including the settings that aren’t shown in the screenshot below):
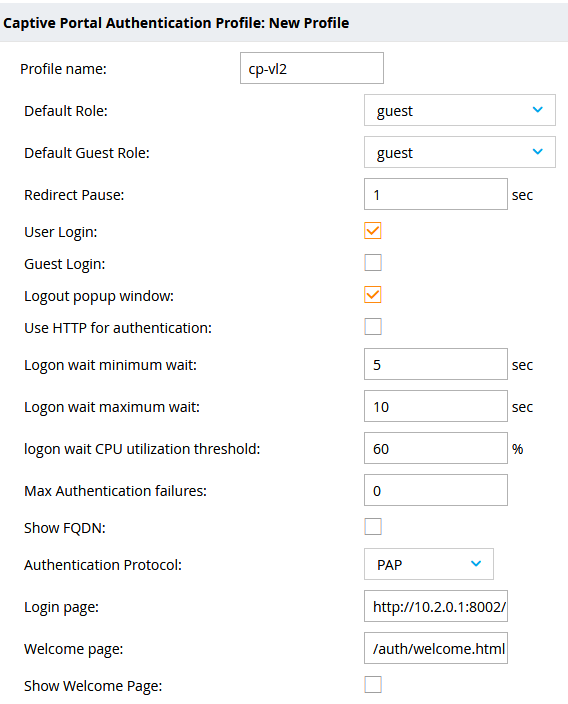
You can tell by the available settings that this interface is mostly suited to configuring the WLC’s local captive portal. This makes it awkward to deduce that you can configure the external captive portal here. On the CLI, the new profile can be viewed with the command show aaa authentication captive-portal cp-vl2 (in this example).
Time to move on to the next configuration piece, which is hidden under Configuration -> System -> Profiles -> Wireless LAN -> Virtual AP -> testwlan3 (in this example) -> AAA. Who needs documentation? In the AAA profile, you need to change the initial role to the role that got created for you with the captive portal profile. In this case, the role name is cp-vl2. The Aruba WLC applies policies and rules that get mapped to clients via roles. When a client makes a new association to an AP to set up a connection, the initial role gets applied to the client, causing the captive portal redirect.
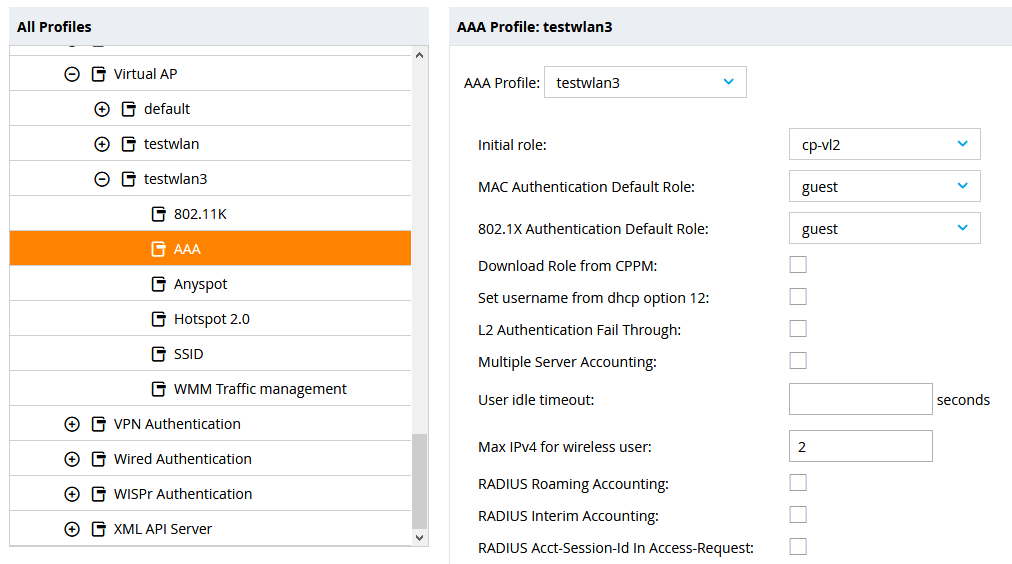
Note that the AAA profile can also be configured via Configuration -> Authentication -> AAA Profiles. If you configure the AAA profile via the Virtual AP, the applied configured will also show via this alternative way. I just stuck with the Virtual AP option because that was the first way I got this configuration to work, but it seems to be explained with different steps in different places.
I encountered another peculiarity of the web interface under the WLAN Access configuration. Usually, it should list the name of the configured default role in this place. This is the case when I apply a default role, like logon, for example. With the custom captive portal role however, the web interface shows the configured role as an empty value, even though the configuration is working. The initial role of the aaa profile can also be verified with the CLI, by using the command show aaa profile testwlan3 (in this example).
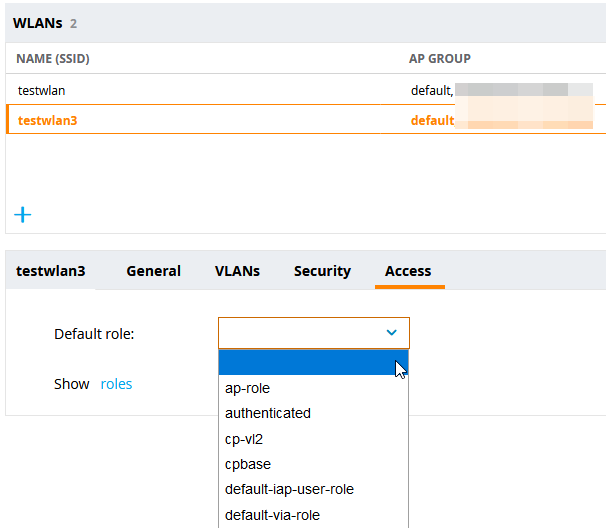
I suspect the strange web interface behavior is mostly related to the missing PEFNG license. The invisible role name might actually be a new default role that is nameless and only applies the captive portal role as the initial role, so the invisible role and the captive portal role are not the same thing.
With the configuration as shown above, the WLC applies the captive portal redirect by using the role that got mapped to the captive portal profile. The client then gets the captive portal page served. After a successful login, the client gets redirected and is provided with internet access. The initial role is the only setting that you need to change, just save the config after making the change and don’t forget to deploy it. Contrary to something like the Cisco CLI, the Aruba WLC only applies config changes when you actually deploy them. You can deploy them with the write memory CLI command, or with the deploy button in the web interface.
It took me quite some time to figure out this particular setup, so maybe this write-up will save someone else some time. Feel free to leave any comments or questions on Facebook, Twitter or LinkedIn.