Setting up the successor to UnetLab: EVE-NG!
Published on 2017-04-11I’m happy to bring an update to my previous article about Unetlab. The successor to Unetlab, named EVE-NG, is now released. EVE-NG stands for Emulated Virtual Environment Next Generation and it’s packed with cool new features. I will describe some of them in this article, along with the setup procedure which is very similar to setting up Unetlab.
The new features that I like the most are a native HTML5 client, the UKSM implementation, and the capability to be installed from an ISO on a bare-metal machine. The HTML5 feature will be demonstrated later on in this article. UKSM stands for Ultra Kernel Samepage Merging and it’s basically used to do memory deduplication. This means that running multiple instances of the same OS in your lab only costs you a little bit of extra memory per instance. Robin Gilijamse has a cool demonstration on his blog.
Like Unetlab before it, EVE-NG can be run as a virtual machine on top of hypervisors supporting its virtual disk format. The format is VMDK so software from VMware can run the VM. Your free options are running a box with the type 1 hypervisor product ESXi, or you can use VMware Player on Windows or Linux. The download page can be found here. You can provide the VM with 16 GB of RAM or more if you want to build fat labs, although the new UKSM feature helps scaling up a lot too. If you just want to run small labs you can get away with as little as 4 GB. This tutorial will use VMware player and a VM that gets 8 GB. You just run and configure the VM, upload the NOS image you want to use and connect to the web interface to start building your lab. Let’s get to it.
Obtaining the software
When you have VMware Player ready to go, grab the OVA from the EVE-NG website here. I used the MEGA mirror and it worked. If you want to try the ISO you can also find it on this page. With Unetlab, there was an OVA provided only a couple times and you always had to pull the updates via the OS. With EVE-NG, it seems they provide an up to date OVA most of the times there’s a new version. Once you’ve done your configuration it is of course easier to just update your software via the OS, but it is convenient to start with an up to date OVA when you first set it up.
Running the virtual machine
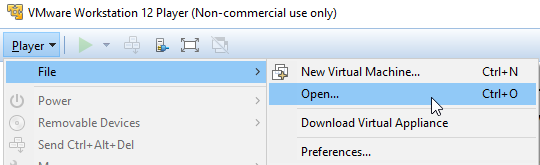
Run VMware Player and select Player -> File -> Open:
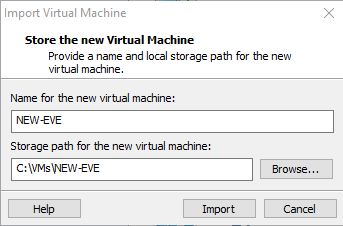
Select the OVA you grabbed from the website, name the VM, select a storage location, then click Import:
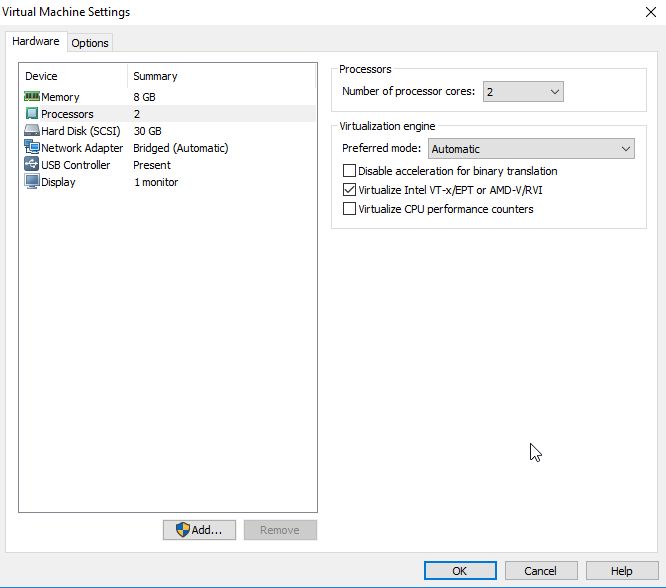
Wait for the import to finish, then right-click your new VM and select Settings. Here, provide as much RAM and CPU cores as you need. Make sure to select Processor and check the option that’s called “Virtualize Intel VT-x/EPT or AMD-V/RVI”. This option allows the VM to be a hypervisor itself which you will need later to run your networking software. For me the default NIC configuration was in bridge mode, which is what I want it to be. You have a few other networking options, but I will save those for a future article.
Now power on the VM and wait for it to present the shell. The default credentials are root:eve. Once you log in you will be asked to do some basic setup including providing a new root password and some network settings. I just use the DHCP from my own network. After providing the settings, the VM will reboot and provide a shell again. If the VM can’t acquire an IP address during the reboot, you might be confronted with an extremely long boot time. After the reboot, log in with your new root password and test your network configuration. The EVE-NG VM does not support the ifconfig command anymore so you can use “ip a”. The adapter pnet0 should have picked up an IP address from your DHCP server if everything went right. Test your connection to internet and your DNS server by pinging a web server via a domain name.
Setting up the VM - initial config
It’s now time to do some household tasks in our fresh VM. First, we want to check the EVE-NG version. If you use the command dpkg -l eve-ng it will output some crap and the EVE-NG version consistent with the version of the OVA we downloaded:

We want to bring our OS and software up to date. It might be worthwhile to instruct our OS to use local mirrors for obtaining software updates. Put the following line at the top of the file /etc/apt/sources.list:
deb mirror://mirrors.ubuntu.com/mirrors.txt natty main restricted universe multiverse
Check if there are updates and install them using the following commands:
apt-get update
apt-get -y install eve-ng
apt-get upgrade
This updates the software packages in the EVE-NG Linux distro and does a reinstall of the most recent EVE-NG version. When done, view the EVE-NG version again.
If you want to run Cisco IOS images you need to setup EVE-NG to handle the licensing right. There is a Python script on Github that really helps. Assuming you are in the home directory of the root user (/root), run the following command. Note that your VM has an SSH server so you can connect to it using SSH and copy the commands:
wget https://gist.githubusercontent.com/paalfe/8edd82f780c650ae2b4a/raw/bd7b6b8a81c338359e6de4ff0ed0def9f7dc9146/CiscoKeyGen.py
Now make the downloaded file executable and then run it:
chmod +x CiscoKeyGen.py
./CiscoKeyGen.py
The keygen gives the following output:
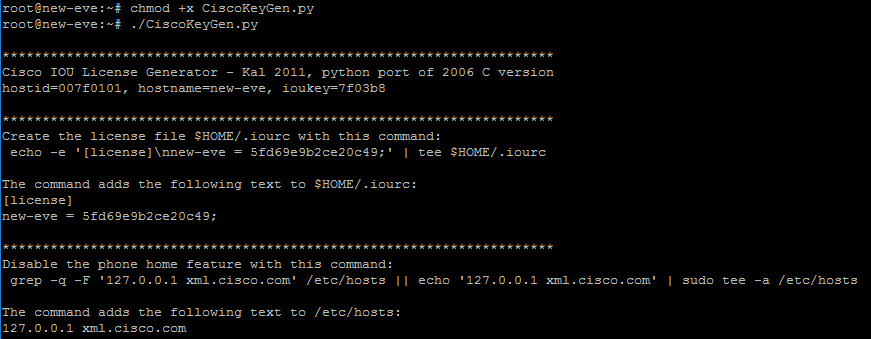
Under [license] it states your host name and a license key. Use this output to form the following commands customized for your VM, then run them:
echo [license] > /opt/unetlab/addons/iol/bin/iourc
echo "ltunl = 99902964f4aa4041;" >> /opt/unetlab/addons/iol/bin/iourc
cat /opt/unetlab/addons/iol/bin/iourc
The last command returns the output of the file you just created and should look something like this:

Setting up the VM - networking setup
Now for some additional networking setup. I like to use a “cloud” interface inside my EVE-NG environment. It’s visualized as a cloud icon in your lab topology and connects your lab to a separate virtual NIC. I connect this vNIC as a bridge to my LAN. This allows me to reach any device inside EVE-NG that has an interface connected to the cloud icon and configured with an address inside my LAN. This opens up possibilities like running scripts that talk to the EVE-NG environment or testing monitoring software, for example.
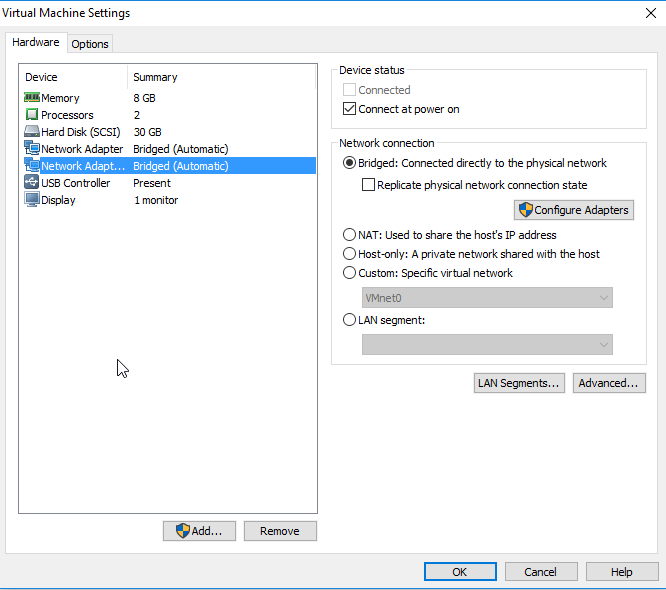
To install an extra vNIC for the cloud interface, power off the VM. I use the command poweroff. When the VM is powered off, open VMware Player again and go to the VM settings. Use the Add button to add another vNIC and make sure it’s configured in bridge mode:
Power on the VM again. When it’s up, run this command:
ifconfig -a | grep ^eth
It will list the vNIC interfaces that the VM knows:

The file
etc/network/interfaces should look like this (I had to add the bridge_ageing 0 setting using the editor Vi):
root@new-eve:~# cat /etc/network/interfaces
# This file describes the network interfaces available on your system
# and how to activate them. For more information, see interfaces(5).

# The loopback network interface
auto lo
iface lo inet loopback

# The primary network interface
iface eth0 inet manual
auto pnet0
iface pnet0 inet dhcp
    bridge_ports eth0
    bridge_stp off
    bridge_ageing 0

# Cloud devices
iface eth1 inet manual
auto pnet1
iface pnet1 inet manual
    bridge_ports eth1
    bridge_stp off
    bridge_ageing 0

iface eth2 inet manual
auto pnet2
iface pnet2 inet manual
    bridge_ports eth2
    bridge_stp off
    bridge_ageing 0

iface eth3 inet manual
auto pnet3
iface pnet3 inet manual
    bridge_ports eth3
    bridge_stp off
    bridge_ageing 0

iface eth4 inet manual
auto pnet4
iface pnet4 inet manual
    bridge_ports eth4
    bridge_stp off
    bridge_ageing 0

iface eth5 inet manual
auto pnet5
iface pnet5 inet manual
    bridge_ports eth5
    bridge_stp off
    bridge_ageing 0

iface eth6 inet manual
auto pnet6
iface pnet6 inet manual
    bridge_ports eth6
    bridge_stp off
    bridge_ageing 0

iface eth7 inet manual
auto pnet7
iface pnet7 inet manual
    bridge_ports eth7
    bridge_stp off
    bridge_ageing 0

iface eth8 inet manual
auto pnet8
iface pnet8 inet manual
    bridge_ports eth8
    bridge_stp off
    bridge_ageing 0

iface eth9 inet manual
auto pnet9
iface pnet9 inet manual
    bridge_ports eth9
    bridge_stp off
    bridge_ageing 0
Now reboot the VM using the reboot command. When the VM is running again, use the command brctl show to show the bridge interfaces configured on the VM and their status:

You now have configuration for 10 network interfaces in place, which is the VMware Player limit. Two of those interfaces are up and running and bridged to a vNIC presented to your VM.
Uploading images
The next step is to upload some software images that you want to use. EVE-NG supports multiple image formats, like dynamips, iou and qemu. I am not familiar with the recent progress of the GNS3 project, but images that used to run on GNS3 well a couple of years ago are dynamips images and they work in EVE-NG too. Qemu is cool because you can convert a lot of different generic x86 virtual machines to a qemu image. A lot of vendors release x86 VM versions of their products, including examples like Fortinet’s FortiGate VM or Juniper’s vMX router. You can find a list of images that EVE-NG supports here.
The directories where the images go are used as follows:
/opt/unetlab/addons/dynamips: Dynamips images go here/opt/unetlab/addons/iol: IOL or IOU images go here/opt/unetlab/addons/qemu: qemu images (including vIOS) go here
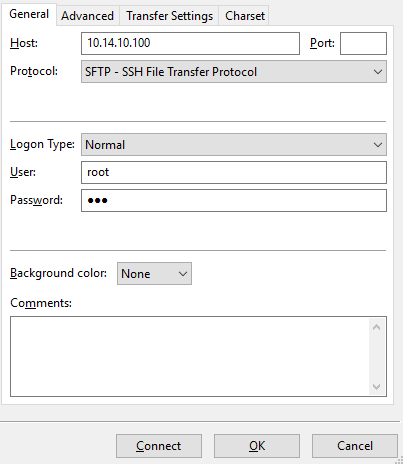
I use FileZilla to make an SFTP connection to the EVE-NG VM. SFTP is like FTP built into the SSH server. My settings look like this:
I use an IOL image named i86bi-linux-l2-adventerprisek9-15.2d.bin so I placed it in /opt/unetlab/addons/iol/bin. After uploading, run the following command:
/opt/unetlab/wrappers/unl_wrapper -a fixpermissions
The upload process for working with qemu is slightly different. You have to create a folder with the image name under the qemu path, for example like this: /opt/unetlab/addons/qemuvios-adventerprisek9-m-15.4-1.3.0-181/. In that folder, you place the qemu image which should be named hda.qcow2.
Building a lab
We are now ready to set up our client device and connect to the GUI. You have two options for controlling the GUI of your lab devices. From any client OS, you can use the HTML5 client. On Windows, you can install a client integration pack and connect local applications like Putty and UltraVNC to your lab devices. You can download the Windows client integration pack here. There is also integration for Linux now, but I haven’t made time to test that yet. The Linux client integration pack can be downloaded here.
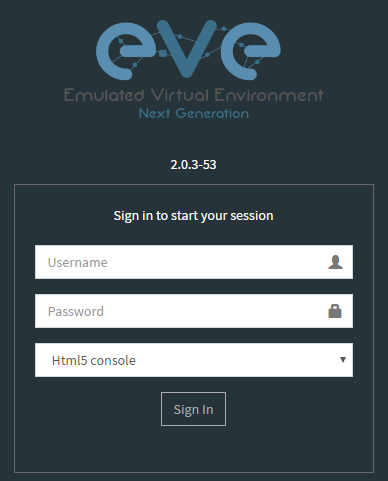
Point your browser to the IP address of your EVE-NG VM. Log in with the default credentials admin:eve. We will select the HTML5 option for this tutorial, but if you installed the client integration pack you can also keep it on native:
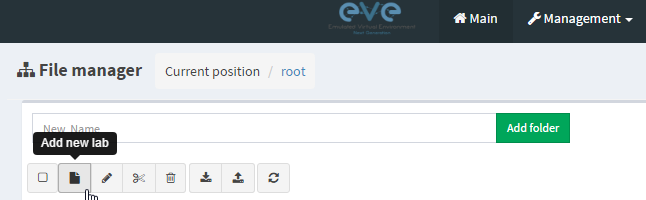
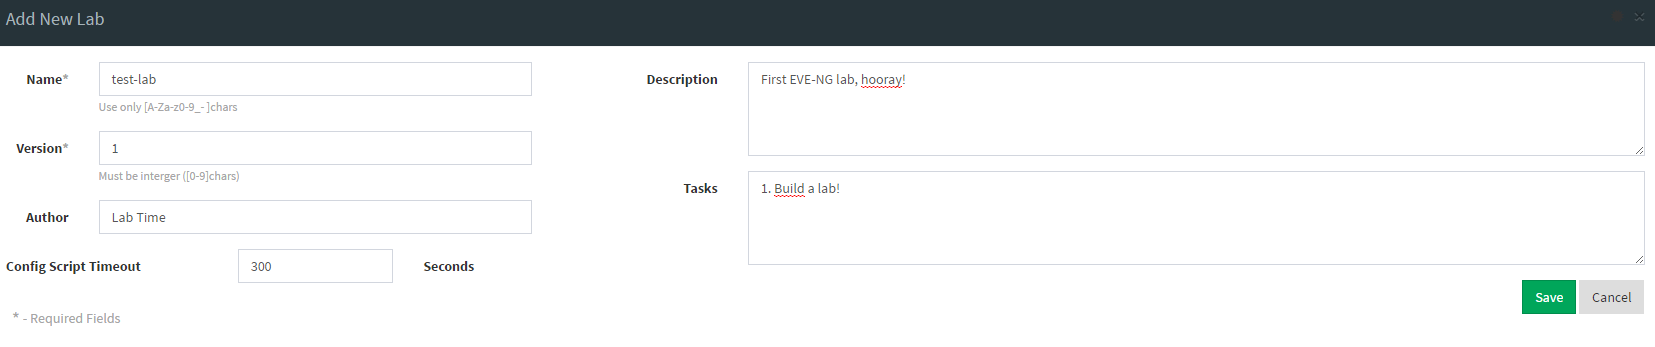
Click the add-new-lab button and then fill out the forms:
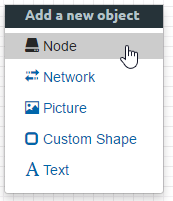
Right-click on the empty grid to add a new object, then select Node:
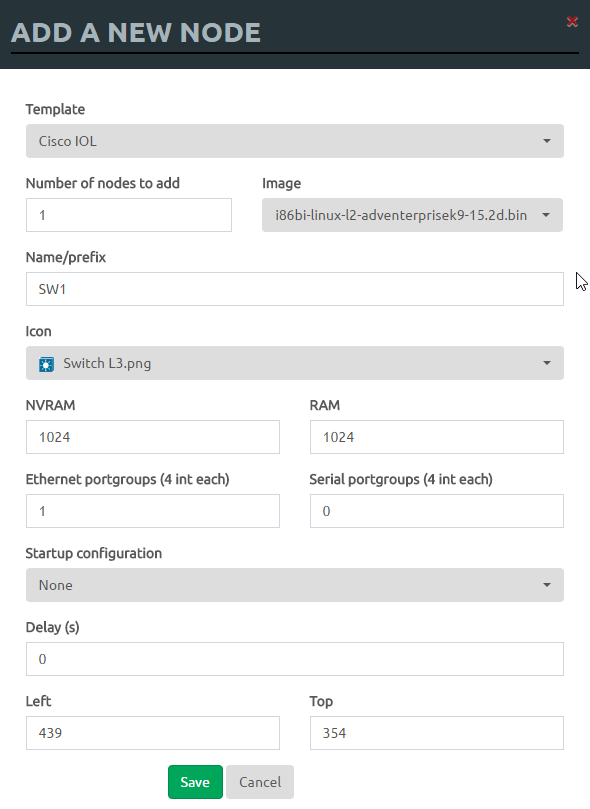
Now select a template, fill in a name, select an icon and select an image:
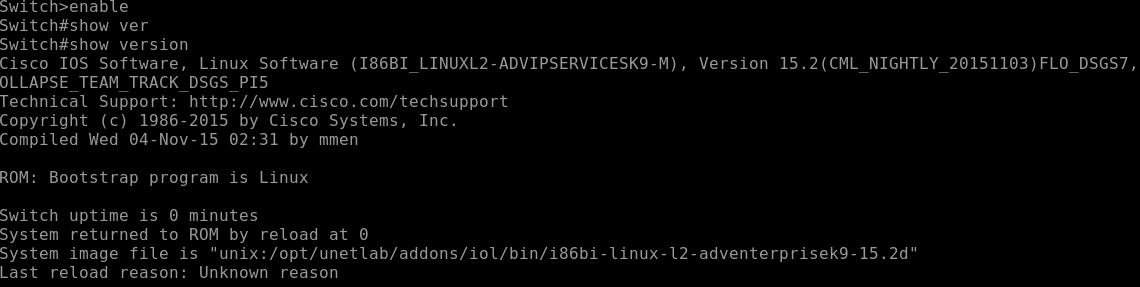
Right-click on the new device and select Start. After the device has started, you can click on it to automatically open a HTML5 session in a new tab.
EVE-NG uses the Apache Guacamole library for its HTML5 functionality, a very cool library but you can occasionally still run into issues. If that happens, just try the native option.
Connecting to your lab environment
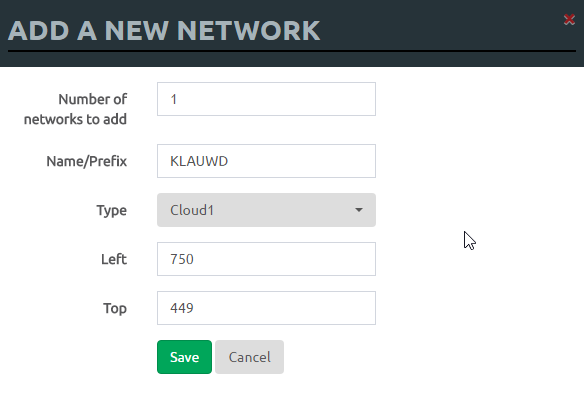
If you want to connect your lab environment to the rest of your network, you can do so by using the cloud interface that we did the preparation for earlier. Right-click in the topology again, but this time select Network to add a new network object. Make sure to give it a name and set the Type to Cloud1 or a higher number that you provided a vNIC for:
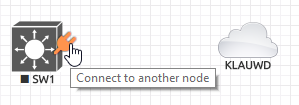
To connect objects together, make sure the relevant nodes are powered off. Use the mouseover connector icon, then drag the connector from the first object to the second.
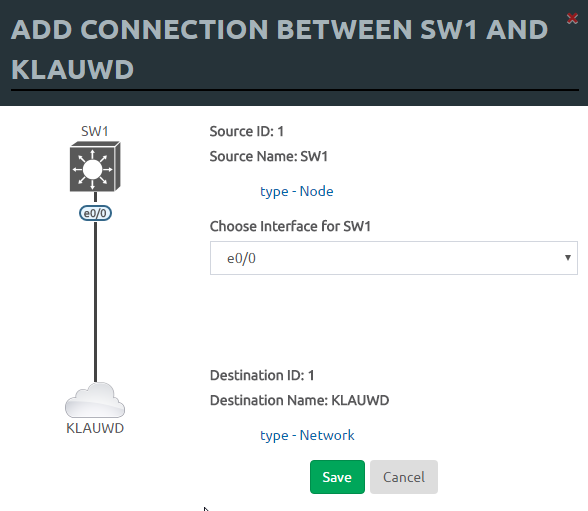
This will open a dialog for selecting interface numbers:
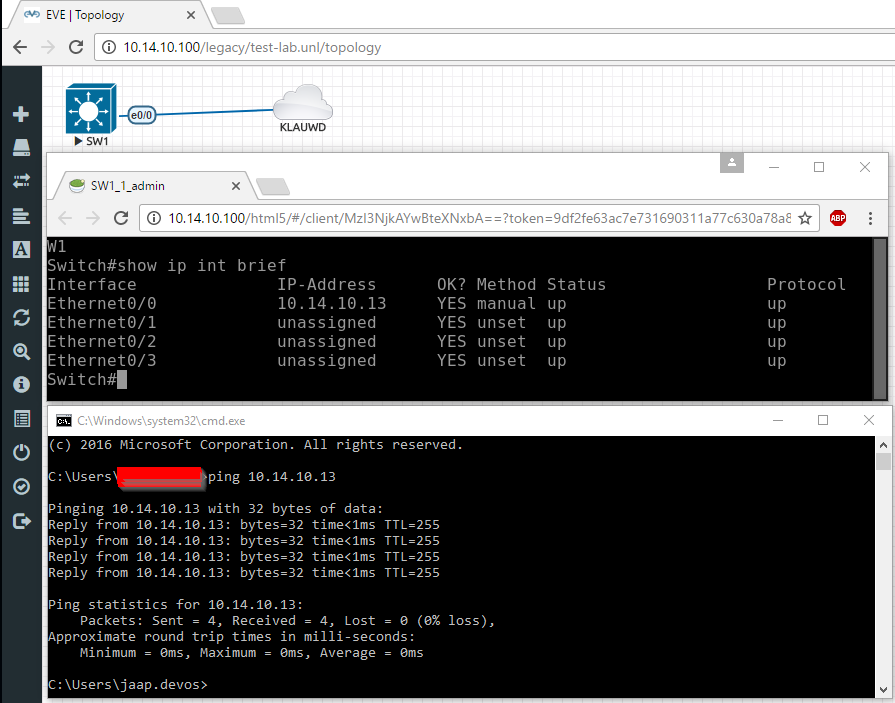
The device is now connected to your network via the bridge interface. You can connect multiple lab nodes to each other in the same way. If you configured the device interface with correct settings for your network you can reach it at this point:
So that’s it, you can build topologies and test your own stuff with this setup. You might be interested in the official how-to’s which can be found here. Thanks for reading yet another Conproly article and be on the lookout for a follow-up with tips and tricks for using EVE-NG on a laptop. Comments are highly appreciated, the way to reach out is via social media.